Brave Wallet is a product of Brave browser, a famous privacy-first and ads-free browser.
Brave Wallet allows users to buy, store, send, swap, and connect with Web3 dApps.
Unlike, other crypto wallets, Brave is a browser in-built wallet; it’s not an extension.
To use Brave Wallet, you need to download the Brave browser.
To create Brave Wallet account, you need to click on the “Wallet icon” at the top right corner of the Brave browser.
Then, follow the account setup process that includes setting a new password and backup your recovery/ seed phrase.
Brave Wallet vs MetaMask
Brave Wallet and MetaMask are decentralized crypto wallets that allow users to store, send, swap, and connect to Web3 dApps.
Among these two wallets, MetaMask is the front-runner and has over a whopping 30 million monthly active users.
Though the Brave Wallet is a newcomer, it has a few advantages over MetaMask. Browser in-built is one such advantage that gives users more speed and burns less CPU and memory.
| Features | Brave Wallet | MetaMask |
| Network Support: Ethereum, EVM chains, Solana, SPL chains, and Filecoin | Yes | No; Limited networks only |
| Token Swap on Ethereum, Polygon, Binance Smart Chain, Optimism, Celo, and Avalanche | Yes | Yes |
| Browser in-built | Yes | No; it’s an extension |
| Hardware Wallet Support | Ledger and Trezor | Ledger and Trezor |
| Live market data | Yes, by CoinGecko | No |
| Connection to dApps | Ethereum and Solana | Ethereum only |
| Open license | Yes | No |
Steps to Create and Use Brave Wallet
- Download Brave
- Run the Installer
- Click “Wallet Icon”
- Set Password
- Back-Up and Verify Recovery Phrase
- Use Brave Wallet
1. Download Brave
As mentioned earlier, to use Brave Wallet, you need to install the Brave browser.
First, download the Brave browser.
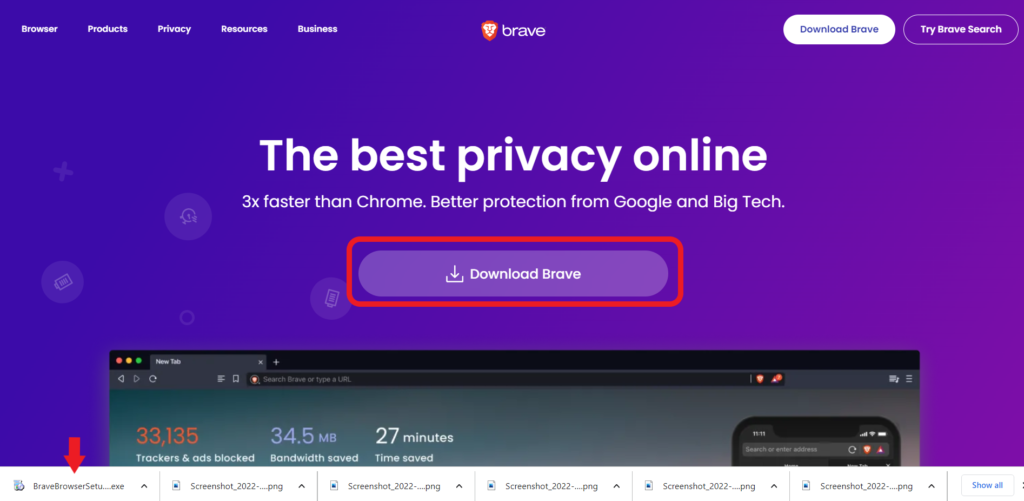
To do so, you need to visit the official Brave website.
Once you are on the website, click “Download Brave” button.
2. Run the Installer
After clicking the Download Brave, a .exe file will be downloaded at the bottom left of your Chrome or Firefox browser.
Click on it to install the Brave browser.
Now, click on “Let’s go”.
Next, you can import bookmarks from IE, Chrome, or Firefox if you want to.
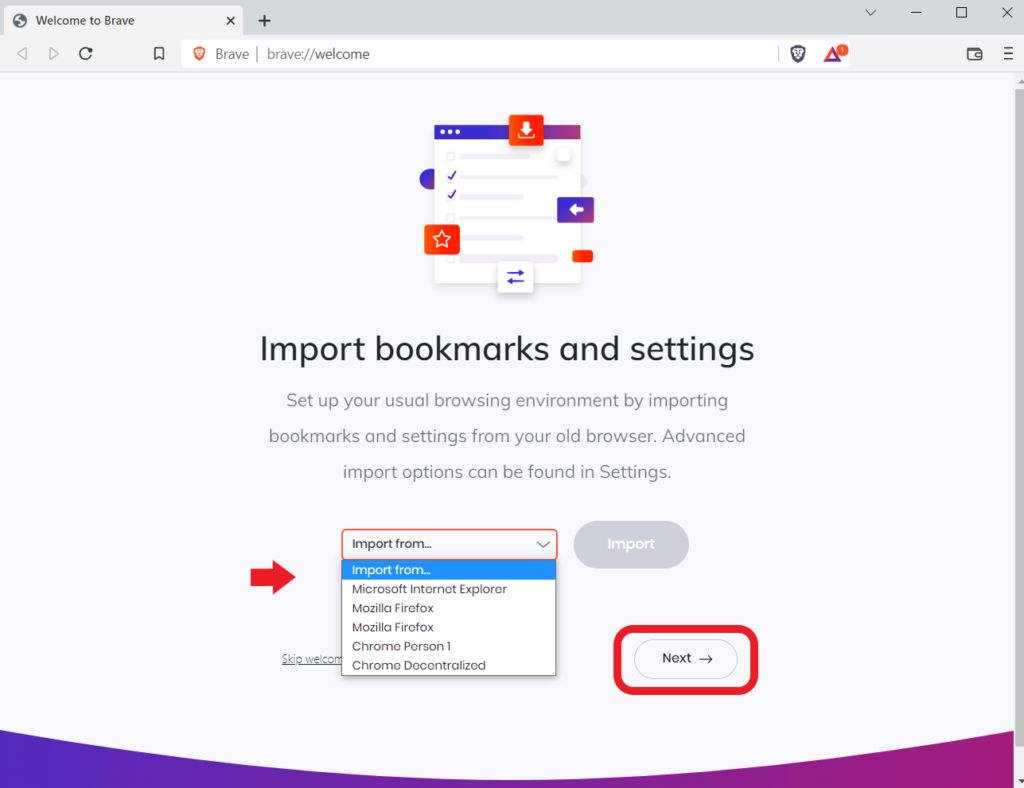
Next, click on “Done”.
That’s it. You have successfully installed the Brave browser.
3. Click “Wallet Icon”
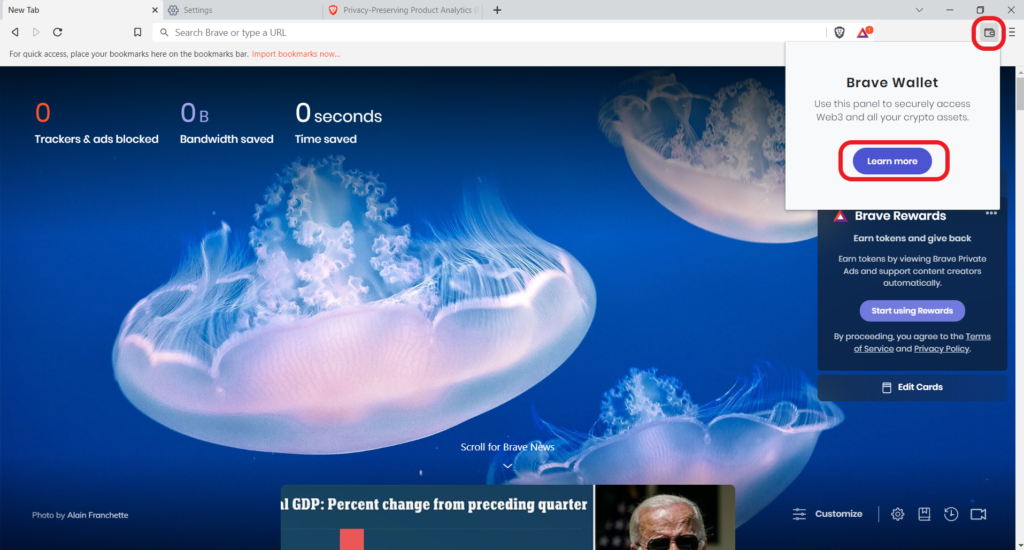
After the successful installation, you will be able to the “Wallet icon” in the upper right corner of the browser.
Click on it and then, click “Learn more”.
4. Set Password
After clicking on Learn more, you will land on the wallet onboarding page.
Here, you can see two options: Get Started and Restore.

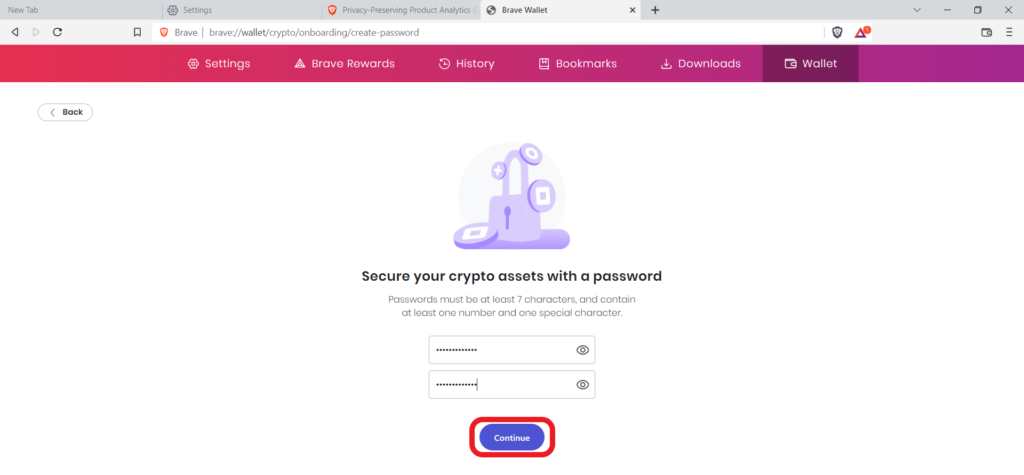
Next, you will be asked to set a new password to lock your Brave Wallet.
Enter a password in the given boxes. Remember password must contain at least 7 characters, and contain one number and one special character.
Once you have set the password, click “Continue”.
5. Back-Up and Verify Recovery Phrase
The next phase is backing up and verifying the recovery phrase.
Recovery/ seed phrase is a phrase that is the only way to regain access to your Brave wallet account in case of a forgotten password, lost or stolen device, or switching wallets.
Hence, it is very important to store your 12-word Brave wallet recovery phrase in a safe and secure place.
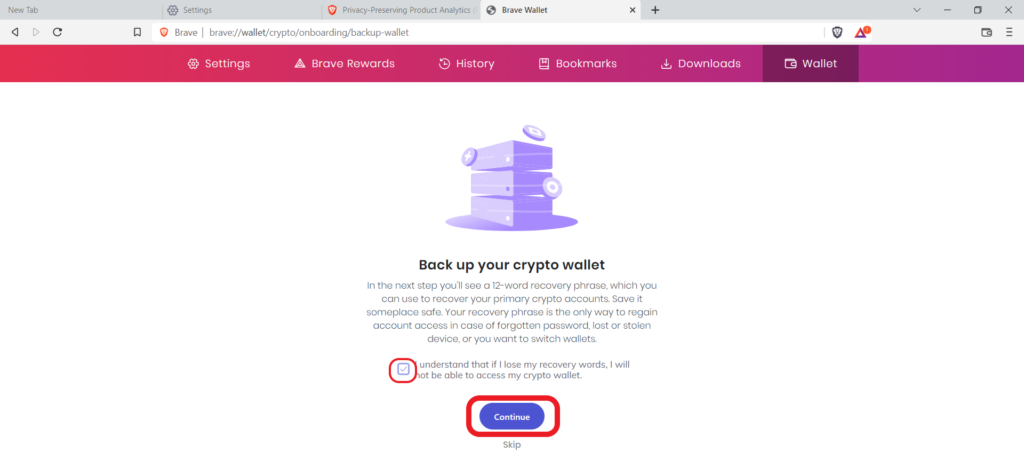
Now, the importance of the recovery phrase will be displayed to you.
Read it and select the checkbox.
Lastly, click “Continue”.
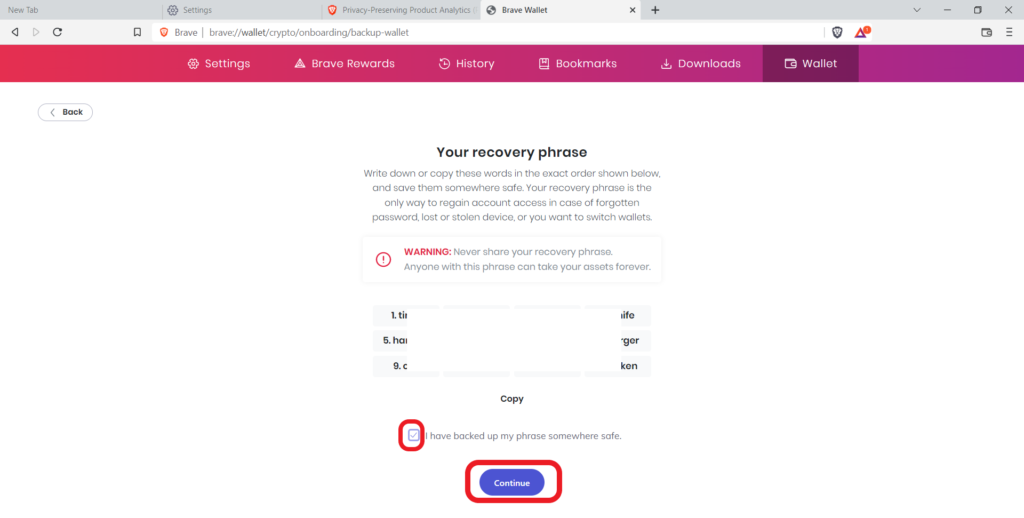
Upon clicking Continue, you can see your 12-word Brave Wallet recovery phrase.
We recommend you write it down on a piece of two paper and store in it a place where you only have access to it.
After backing up the recovery phrase, select the checkbox and click “Continue”.
Next, you need to verify your recovery phrase.
Select the words given in the correct order and click “Verify”.

6. Use Brave Wallet
Now, you are one step away from using the Brave Wallet.
You need to enter the password to unlock the wallet.
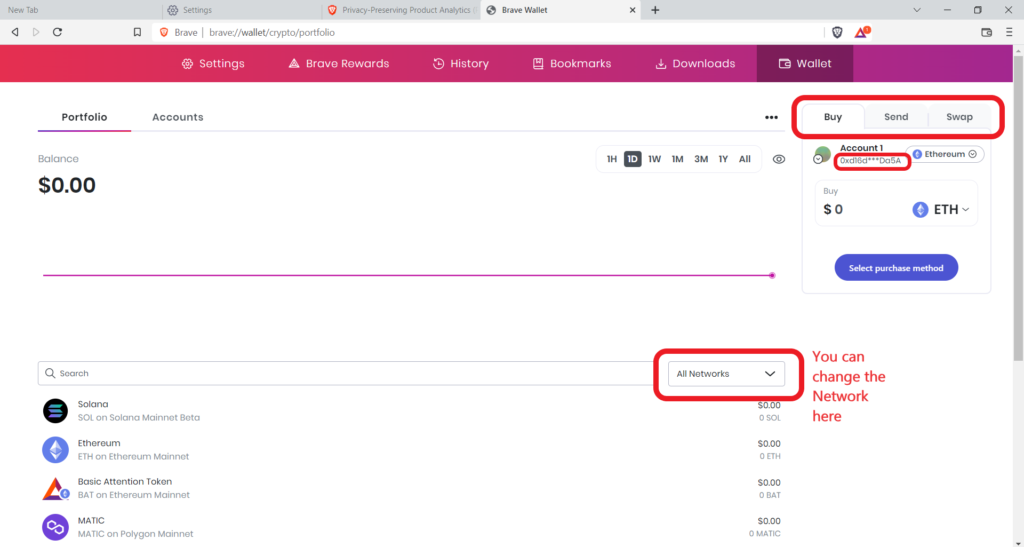
Brave Wallet has a simple and clean user interface.
Anyone can buy crypto in Brave wallet using the Ramp or Wyre purchase methods.
Then, you can send or swap cryptocurrencies with ease.
To receive crypto from other wallets or centralized exchanges, you need to copy your Brave Wallet address.
To do so, click on the “partial address” at the top right corner under Buy, Send, and Swap.
Conclusion
Installing and creating a Brave Wallet account is a straightforward process.
After creating a Brave Wallet account, you can buy, send, and swap many cryptocurrencies.
Always remember to store your Secret Recovery Phrase/ Seed Phrase in multiple places to prevent it from losing. If you lost them, nobody can access your account—even Brave developers.
It is wise to store the recovery phrase in a physical piece of paper rather than in an email or computer.
Beware of scams. Nobody will ask the recovery phrase including the Brave team at any point in time.
If your recovery phrase gets exposed, your fund will be compromised.
FAQs
1. Is Brave Wallet Safe?
Brave Wallet is a multi-chain crypto wallet from the Brave browser. Since it is a browser in-built wallet (i.e. not an extension like other wallets), there is less chance of phishing or a fake version of the application. Hence, it is safer than MetaMask and other crypto wallets.
2. Is Brave Wallet available as a mobile application?
Since Brave Wallet is built inside the Brave browser, it is available as a mobile application for both Android and iOS. It is also available as a desktop application for Windows, macOS, and Linux.
