MetaMask is a famous crypto wallet that allows users to access blockchain applications.
MetaMask primarily supports ERC-20 tokens. However, you can add other networks, such as Binance Smart Chain, Polygon, Harmony, Avalanche, Fantom, Cronos, Arbitrum, and more manually.
To remove/ delete a network in MetaMask, click the Dropdown menu.
Hover to the network that you want to delete.
Click on the close icon and click Delete.
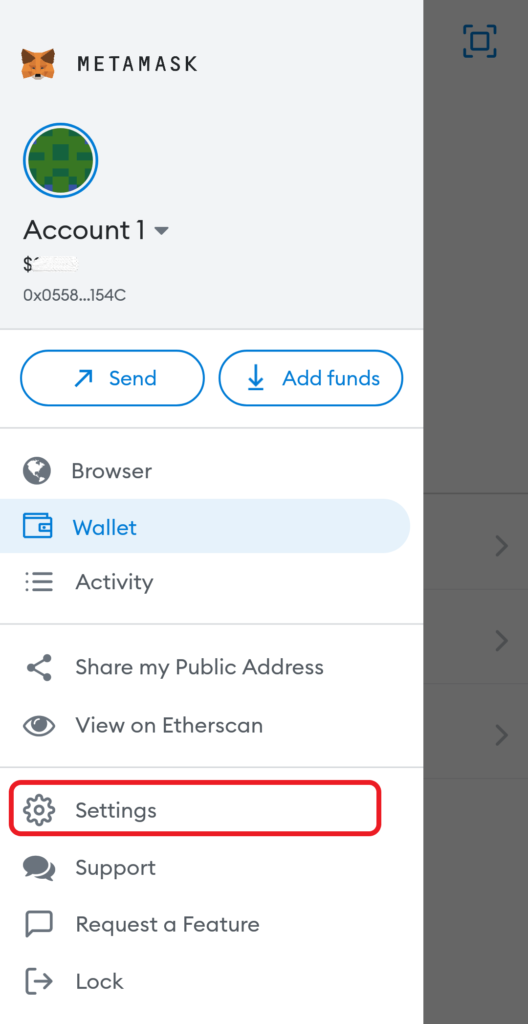
Alternatively, you can go to Settings.
Click on Network.
Then, click on the Network that you want to delete and click Delete.
In case you want to delete test networks, you must drop that idea.
Because you can’t be able to delete test networks. However, you can hide them.
To do so, you need to go to Settings.
Then, click Advanced.
Scroll a bit to reach “Show test networks” and click the toggle icon to Off.
Steps to Delete a Network on MetaMask
- Unlock the MetaMask Wallet
- Click the Network Dropdown
- Hover over the Network that You Wish to Delete
- Click on Delete
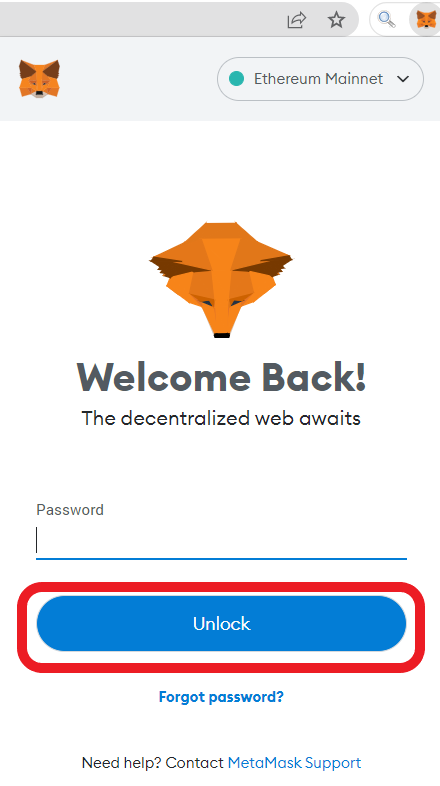
1. Unlock the MetaMask Wallet
Launch the MetaMask wallet extension.
Type in the password to unlock it.
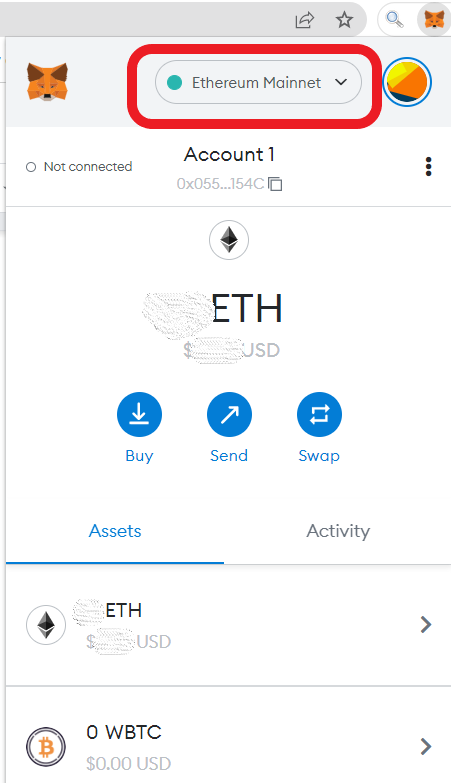
2. Click the Network Dropdown
After getting inside your MetaMask wallet account, you will be able to see your account balance and assets.
Above your account balance, you will find the Network Dropdown box.
Click on it.
3. Hover Over the Network that You Wish to Delete
After clicking on the Network Dropdown box, you will be able to see a list of networks that you have added to your MetaMask account.
Hover over the network that you want to delete.
By doing so, you will be able to see a close icon (X).

4. Click on Delete
Now, you need to click on the close icon (X).
A confirmation pop-up will appear.
Click Delete.

Steps to Delete a Network on MetaMask Mobile Application
1. Install MetaMask Mobile Application
In case you already have installed the MetaMask application, make sure you have the latest version.
You can find the MetaMask mobile application here: Android and iOS.
After installing MetaMask, you need to set up your account.
The account setup process includes creating a password and storing your recovery phrase.
If you already have an account, you can import it using your recovery phrase.
For further clarification, you can refer to this guide: How to Create a MetaMask Wallet: A Step by Step Guide.
2. Go to Settings
Open the MetaMask mobile application.
To go to Settings, you need to tap on the three parallel lines in the upper left corner of your mobile screen.
Then, navigate to Settings and tap on it.
3. Tap on Networks
After tapping on Settings, you will be able to see multiple options.
Tap on Networks.

4. Delete the Network
Now, you will be able to see the list of networks that you have added.
Long press on the network that you want to delete.
A confirmation pop-up will appear.
Tap on Remove.

Conclusion
You can easily delete the custom RPC networks that you have added to your MetaMask wallet with this latest update.
You cannot delete the test networks that are available inside the MetaMask wallet by default.
However, you can hide them by going into Settings.
Then, click Advanced and navigate to Show test networks.
Click the toggle icon to Off state.
Hiding the test networks in the MetaMask Android application is not possible at this time of writing the article.