MetaMask is the crypto wallet and gateway to blockchain applications and it is trusted by more than 21 million users worldwide and it is free and secure to use.
MetaMask supports you with key vault, secure login, token wallet, and token exchange, and it’s all you need to manage your digital assets.
It provides the simplest way and most secure way to connect to blockchain-based applications and you will always be in control when interacting on the decentralized web.
With Metamask, you can interact with applications like OpenSea, AxisInfinity, Uniswap, AAVE, GITCOIN, and Rarible.
If you have thought of swapping Enthereum for a token, you need to connect your MetaMask wallet to Uniswap.
Metamask supports IOS, Android native apps along with Chrome, Firefox, Brave, and Edge Browser.
MetaMask, the world’s leading crypto wallet, surpassed 10 million monthly active users in August 2021.

In the following steps, you will learn how to set up MetaMask so that you can easily interact with blockchain applications.
Step by Step Procedure to Create your MetaMask Wallet
Below is the complete detailed steps by steps instruction to create your MetaMask Wallet on your browser.
Entire MetaMask wallet creation takes place in 8 steps and this includes downloading chrome extension, creating a password, getting our backup phrases, and confirming your backup phrases.
- Download MetaMask wallet on Chrome
- Click on the Metamask Extension
- Get Started
- Create a Wallet
- Select “I Agree” after reading all Terms and Condition
- Create password
- Store your backup phrase
- Confirm your backup phrase
- Start using MetaMask
Step 1: Download MetaMask wallet
Before creating a MetaMask wallet you need to download the MetaMask extension to chrome. If you are using a mobile you need to download the MetaMask app on the App Store or Google Play Store.
First Go to https://metamask.io/ where you can click on the “Download Now“ button. Choose your preferred way of installing the MetaMask extension.

In this guide, we will take you through setting up a MetaMask wallet through Chrome.

You can see “Install MetaMask for Chrome” and click on that if you want to install the MetaMask Chrome Extension.
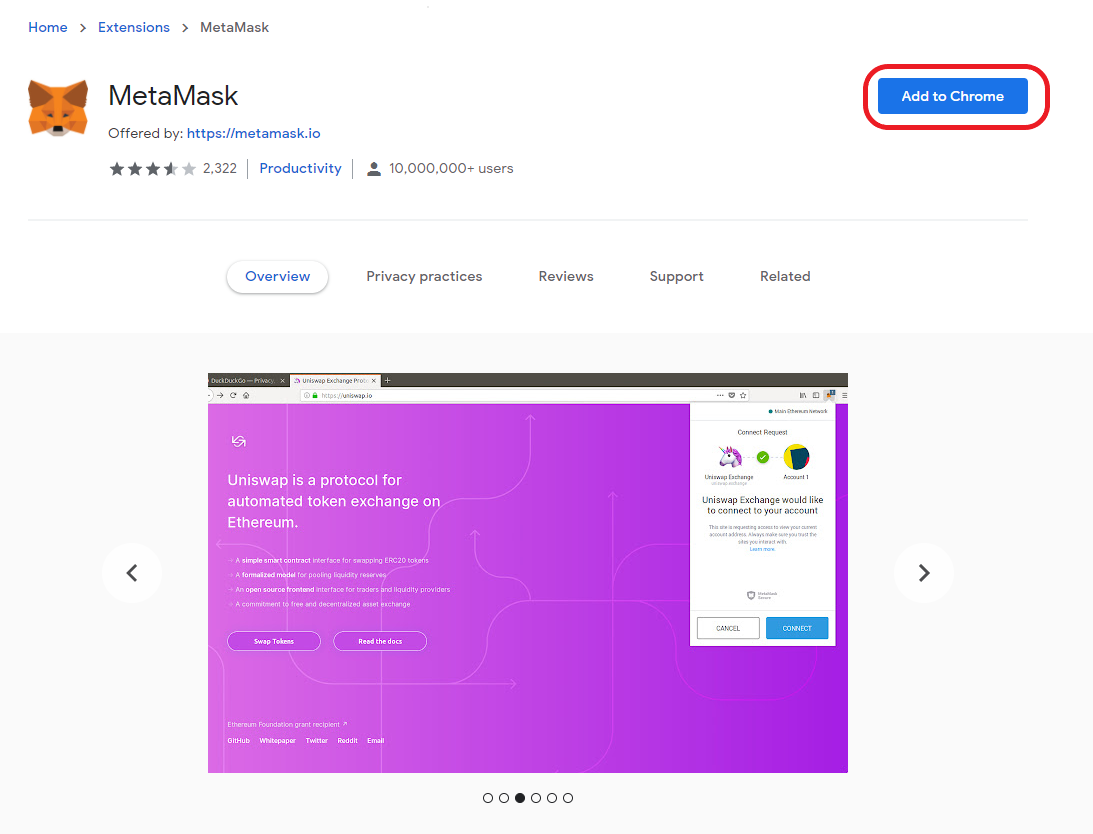
After the process, you will take to the MetaMask page of Chrome Web Store where you can click “Add to Chrome”
Step 2: Click on the Metamask Extension and Click Get Started
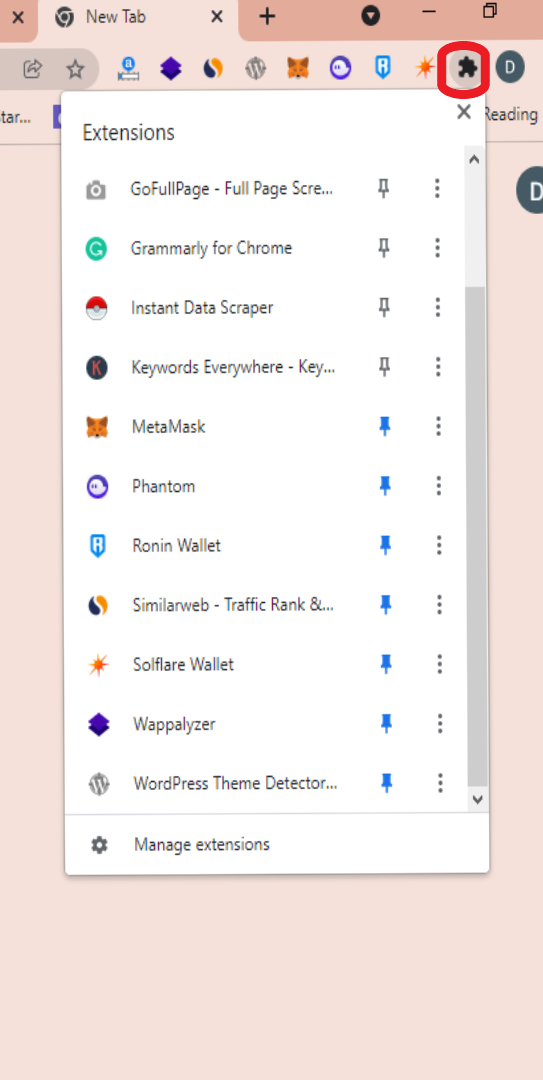
Once you install the MetaMask Extension to Chrome, To access it you need to open it
On the right corner of the navigation bar, you can able to puzzle icon.
You can click on the puzzle icon to open the chrome extension where you can able to see all the extensions that you have downloaded.
Scroll down unless you find the MetaMask Extensions.
You can pin the MetaMask Extention so that you can able to access the extension on the navigation bar directly.
Click on the “MetaMask” extension to open the MetaMask Extension.
Step 3: Get Started
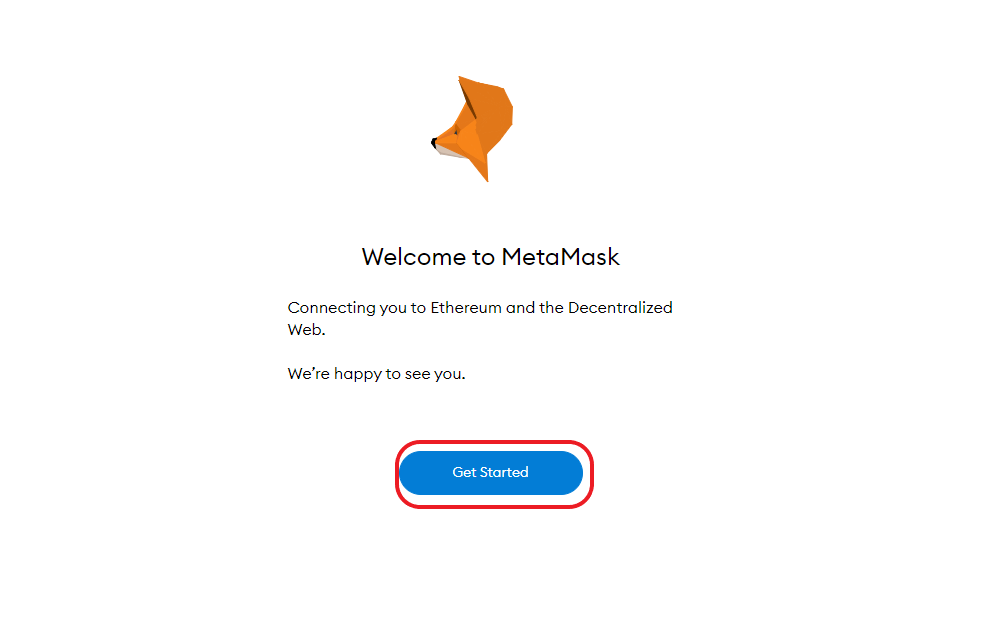
After clicking on the MetaMask extension you will land on the ”Welcome to MetaMask” page
You could able to see the “Get Started” button.
Click “Get Started” to get started with your MetaMask Wallet.
Step 4: Create a Wallet

After clicking on the “Get Started”, you will land on the “New to MetaMask” page.
On the page, you see two options.
One is “No, I already have a Secret Recovery Phrase.” If you have already created a MetaMask Wallet then this is the right option for you. Then click “Import Wallet”
The second one is “Yes, Let’s get set up!”. This will create a new wallet and Secret Recovery Phrase. If you are creating a MetaMask Wallet for the first time then this is the right option for you.
Since this article is written for someone who is setting up their MetaMask Wallet for the first time, click on “Create a Wallet” to create a new MetaMask Wallet.
Step 5: Select “I Agree”
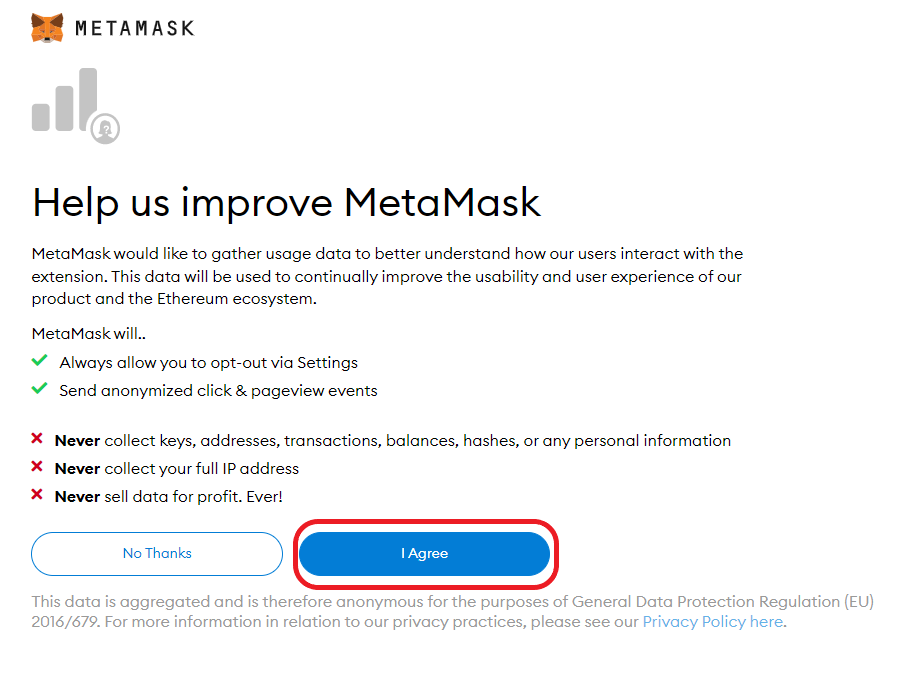
On the “Help us improve MetaMask page”
Before creating a MetaMask Wallet you have to agree to the Terms and Conditions.
You can read out all the rules like how MetaMask stores and collects events.
After reading all the necessary descriptions you Select the “I Agree” button.
Step 6: Create Password

After clicking “I Agree” you were asked to create a Password for your MetaMask wallet
Create a New password and the password must be a minimum of 8 chars
Re-enter your password in Confirm Password field, to confirm your password
Then Check-in “I have read and agree to the Terms of Use” for accepting the rules and agreeing to use the MetaMask Wallet.
If you have time, you can click on “Terms of Use” to look out the terms and conditions before check-in into the rules and conditions.
Click Create to forward to the next step.
Step 7: Store your back-up phrases
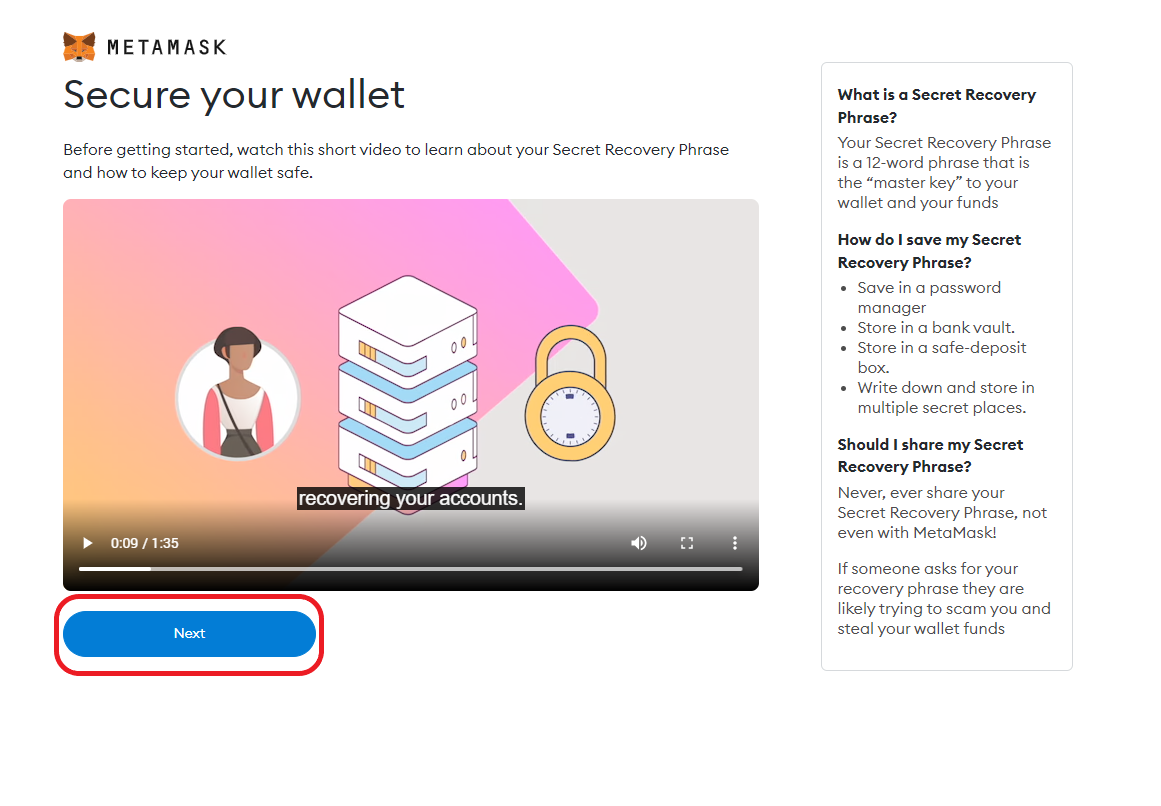
After you create the password. You were shown an Intro to Secure your wallet. You can watch the two-minute video about Securing your MetaMask wallet where they give you a brief description of the Secret Recovery Phrase and how to secure your recovery phrases.
Click “Next” to continue to the next phase of the wallet.
You will be on the Secret Recovery Phrase page.
You have to click “CLICK HERE TO REVEAL SECRET WORDS” to reveal the secret recovery phrases.
After that store these phrases on a piece of paper and store them in a secure location. If you want security, store it in multiple pieces of paper or digitally and keep it in multiple different locations.
Better is to memorize the phrases if you want to or download the Secret Recovery Phrases and Keep them stored on an external encrypted hard drive or storage medium
After storing and memorizing the phrases you can click “Next” to move forward to the next step
Step 8: Confirm your Secret Recovery Phrase

You have to select each phrase incorrect order exactly like secret phrases which are displayed in the previous steps.
Make sure that you have selected each phrase in order and double confirm it.
After entering each phrase in exact order according to your secret recovery phrases. Then you can click “Confirm” to move forward to the next step.
Step 9: Start using MetaMask

Congratulations, you have completed all of your steps properly.
Click on “All Done”, after that you can right now start using Metamask.
Now you are able to store, send and receive ETH and other tokens from your Metamask wallet.
Conclusion
You have successfully created your Metamask wallet and make sure that you have kept your secret recovery phrases in a safer place.
If you forget your secret recovery phrases you will never be able to access your MetaMask wallet that is why we keep mentioning to have your recovery phrases in multiple safe places.
Never share your recovery phrases with anyone.
If someone knows your recovery backup phrases they could be able to access your Metamask wallet and steal your tokens.
Things to remember
- Save your recovery phrases backup in multiple places
- Never share your phrases with
- No one from the MetaMask team will as for your secret recovery phrases
- If you need to back up your Secret recovery phrases again, you can check out it in Setting -> Security.
- Once you lost your Secret Recovery phrases you will never be accessible to the Metamask wallet
You can access Metamask from mobile as well and to download it from your device you can click on the below URL:
IOS – MetaMask Blockchain Wallet: https://apps.apple.com/us/app/metamask/id1438144202
Android – MetaMask – Buy, Send and Swap Crypto: https://play.google.com/store/apps/details?id=io.metamask.
You can also use MetaMask in the dark mode.
5 thoughts on “How to Create a MetaMask Wallet: A Step by Step Guide”