To transfer Ethereum (ETH) from FTX to MetaMask, you need to first copy the MetaMask address.
Then, find Ethereum (ETH) in your FTX account and click on “Withdraw”.
Now, you need to paste the MetaMask address and enter the amount of ETH.
Next, enter the withdrawal password and complete the 2FA.
Lastly, click on Withdraw.
The withdrawal processing typically takes 2 to 5 minutes to complete.
However, it can take longer if the network is congested.
The minimum withdrawal limit for ETH on FTX is 0.01.
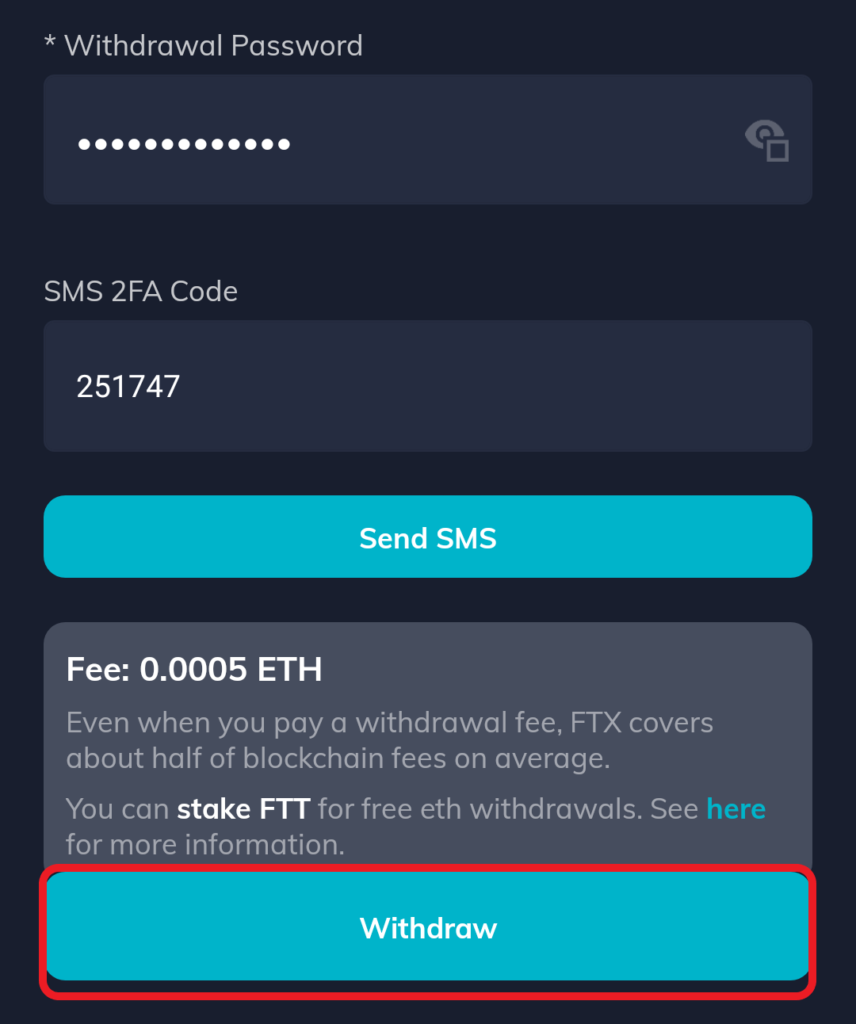
To transfer ETH from FTX to the MetaMask wallet, there will be a withdrawal fee of 0.0005 ETH.
You can withdraw ETH from FTX without a fee if you have staked FTT.
- Steps to Transfer ETH from FTX to MetaMask
- Steps to Transfer ETH from FTX Mobile Application to MetaMask
Steps to Transfer Ethereum (ETH) from FTX to MetaMask
- Copy the MetaMask Address
- Go to your FTX Portfolio
- Find ETH
- Enter the Amount and Paste the MetaMask Address
- Enter the Withdrawal Password and Complete the 2FA
- Check in Withdrawals Section and MetaMask
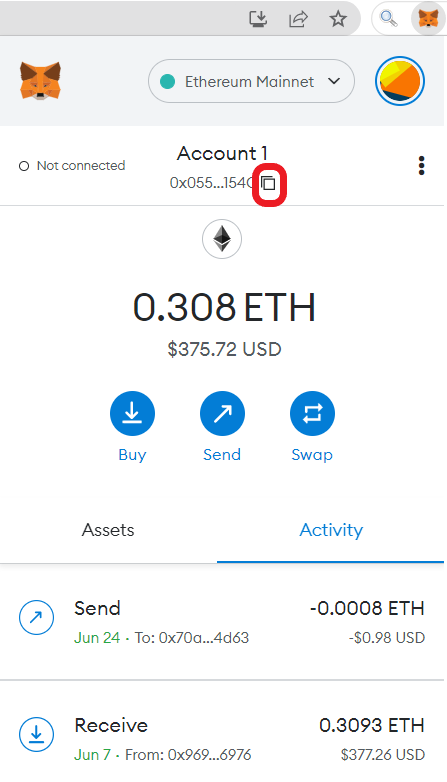
1. Copy the MetaMask Address
Open the MetaMask wallet extension or mobile application.
Type in the password to unlock it.
Click on the copy icon just above the ETH balance.
2. Go to your FTX Portfolio
Go to FTX website. If you are a US resident, visit FTS.US website.
Enter your log in credentials to sign in or you can sign in with Apple or Google account.
After signing in, you will land on your dashboard.
Hover over the Wallet located on the top right corner of the webpage.
Now, you will see multiple options: Portfolio, FTX Card, and Borrow/ Lending.
Click on Portfolio.

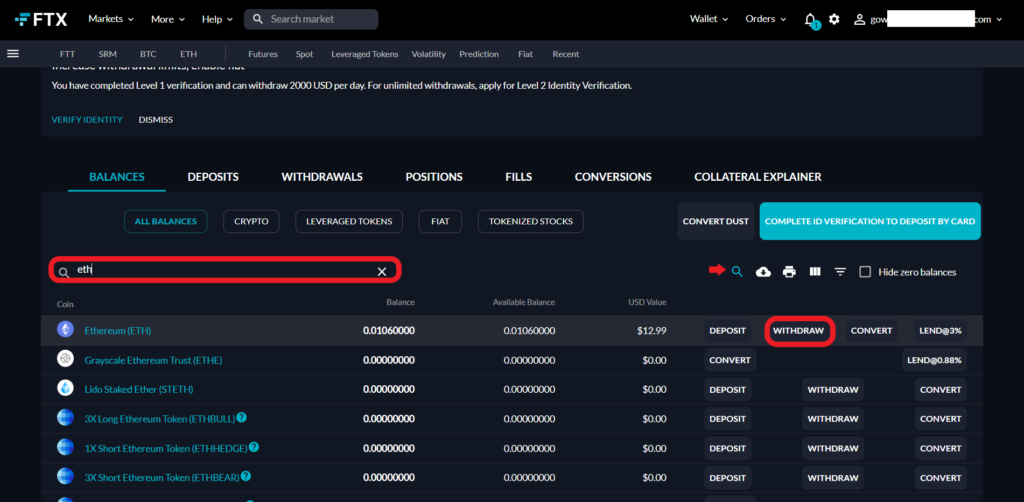
3. Find ETH
Now, you will be able to view the balances of all crypto tokens and fiat currencies.
Make use of the search box to find Ethereum (ETH).
Type “ETH” in the search box and you could see Ethereum (ETH).
Since you are going to transfer ETH from FTX to MetaMask, you need to click on Withdraw.
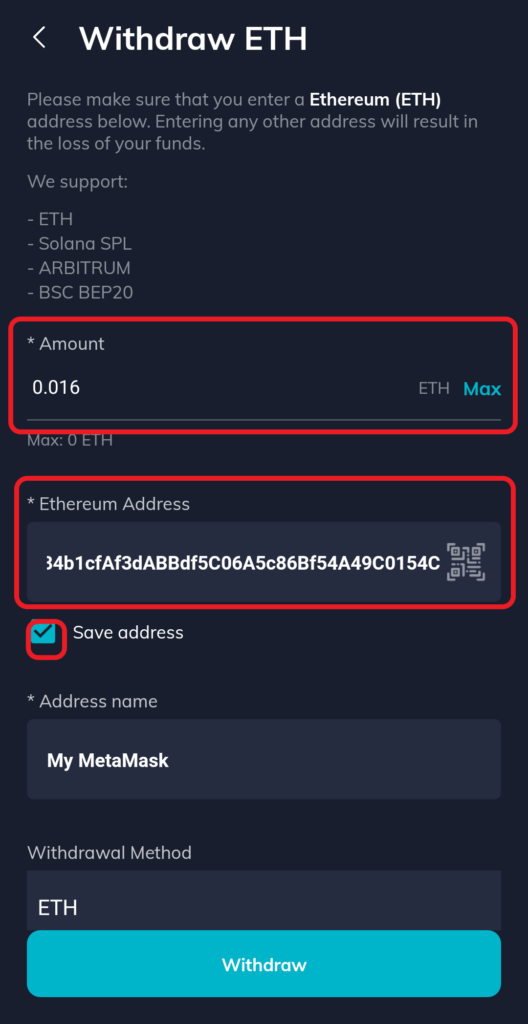
4. Enter the Amount and Paste the MetaMask Address
After clicking on Withdraw, the Withdraw ETH window will appear.
Here, you need to enter the amount of ETH that you wish to send in the Amount field.
Then, paste the MetaMask wallet address that you have copied in Step 1 in the ETH Address field.
Upon pasting the recipient address, the Withdrawal Method field will automatically gets selected as Ethereum network.
If you want to save the address for future use, you can do so by selecting the Save address checkbox.
5. Enter the Withdrawal Password and Complete the 2FA
Then, type in the withdrawal password and enter the 2FA Code. To receive the 2FA code, click on SEND SMS.
Lastly, click on Withdraw.

You have successfully transferred Ethereum (ETH) from FTX to MetaMask.
6. Check in Withdrawals Section and MetaMask
It took 4 minutes for us to receive ETH on our MetaMask wallet.
So, after a few minutes, click on the Withdrawals section.
There you will be able to see your recent withdrawals along with your status.

Then, you can go ahead and open your MetaMask wallet and check the balance and/ or the Activity tab
Steps to Transfer Ethereum (ETH) from FTX Mobile Application to MetaMask
- Copy the MetaMask Address
- Tap on Wallet
- Tap on Withdraw
- Tap on Ethereum
- Enter the Amount and Paste the MetaMask Address
- Enter the Withdrawal Password and Complete the 2FA
- Check in Withdrawals Section and MetaMask
1. Copy the MetaMask Address
Open the MetaMask mobile application.
Tap on the address to copy.
![]()
If you want to scan the QR code instead of copying the address, you can open the MetaMask wallet extension.
Then, click on three dots. Then, click on Account Details.

2. Tap on the Wallet
Launch the FTX Pro mobile application.
Now, you will be able to see multiple options, such as Home, Markets, Trade, Wallet, and User at the bottom of the mobile screen.
Tap on Wallet.
3. Tap on Withdraw
After tapping on Wallet, you will get to see options, such as Stake, Convert, Borrow/ Lending, Deposit, Withdraw, and Subaccount Transfer.
Since we transferring ETH to MetaMask, you need to tap on Withdraw.

4. Tap on Ethereum
Now, a list of crypto tokens will appear.
Make use of the search box to find Ethereum (ETH).
Once you have found it, just tap on it.

5. Enter the Amount and Paste the MetaMask Address
After tapping on Ethereum (ETH), the Withdraw ETH window will appear.
Here, you need to enter the amount of ETH that you wish to send in the Amount field.
Then, paste the MetaMask wallet address that you have copied in Step 1 in the ETH Address field.
Upon pasting the recipient address, the Withdrawal Method field will automatically gets selected as Ethereum network.
To save the address for future use, you can do so by selecting the Save address checkbox.
6. Enter the Withdrawal Password and Complete the 2FA
Then, type in the withdrawal password and enter the 2FA Code. To receive the 2FA code, Tap on SEND SMS.
Lastly, Tap on Withdraw.
You have successfully transferred Ethereum (ETH) from FTX mobile application to MetaMask.
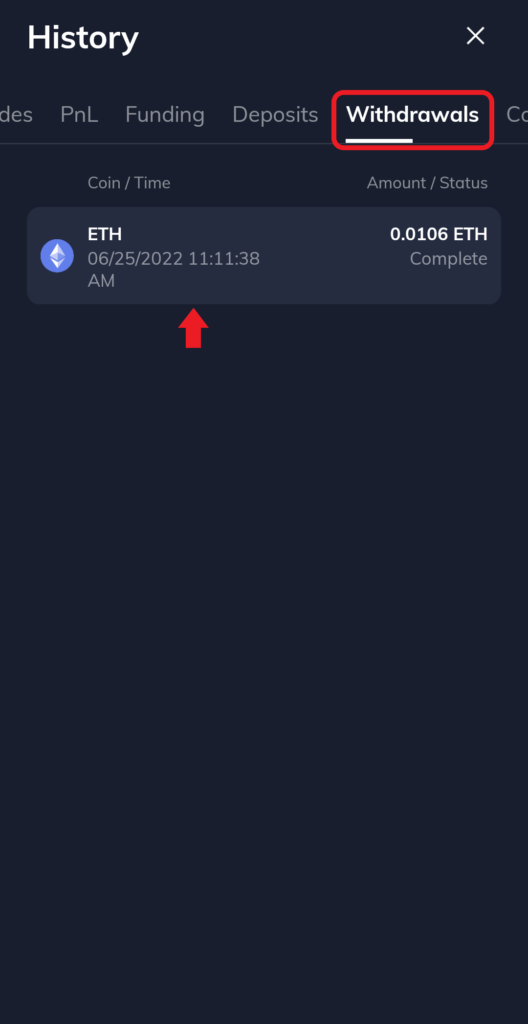
7. Check in Withdrawals Section and MetaMask
It took 4 minutes for us to receive ETH on our MetaMask wallet.
To view the recent transactions, tap on Wallet.
Then, tap on History.
On the History page, you will be able to see multiple options, such as Orders, Traders, PnL, Funding, Deposits, etc.
Tap on Withdrawals.
Conclusion
Transferring/ withdrawing Ethereum (ETH) from FTX to MetaMask is not a straightforward task since it involves entering the withdrawal password and 2FA verification.
By default, you will not have the withdrawal password and 2FA verification enabled. However, enabling these options is very safe and highly recommended.
To enable the withdrawal password and 2FA verification for withdrawals, click on the profile icon/ email address located in the top right corner of the webpage. Then, click on Settings.
Now, Tap on Withdrawal Password and 2FA for Withdrawals to enable these options.
