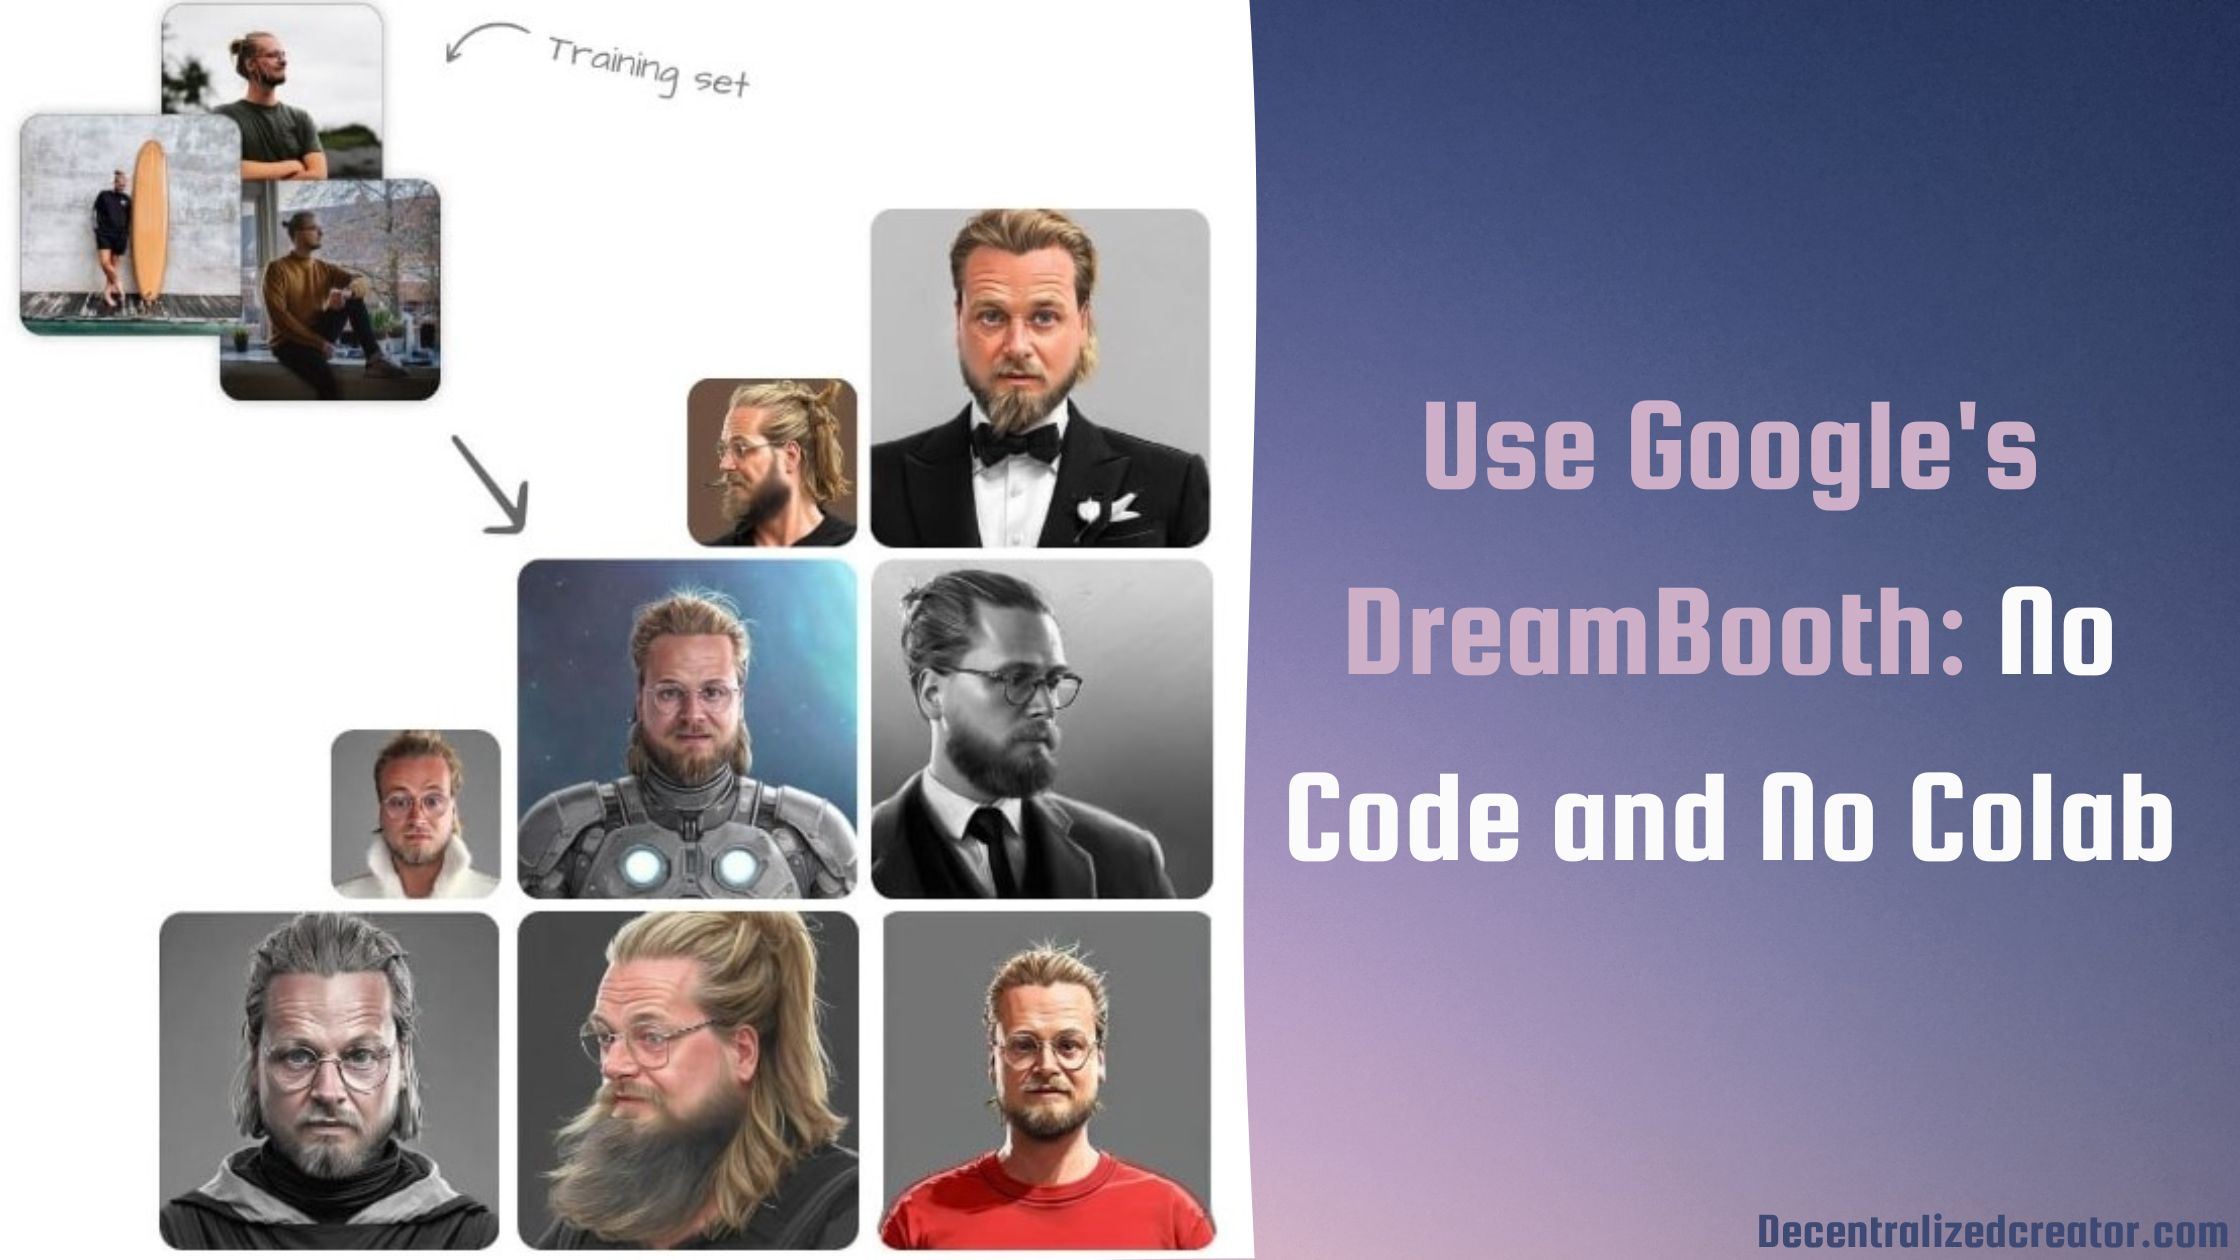
DreamBooth is a subject-driven generative AI model that fine-tunes the work of other diffusion models. Though the other famous generative models, such as DALL.E 2, Midjourney, Stable Diffusion, and Imagen, achieved remarkable growth, they lack the ability to put the subject in different contexts.
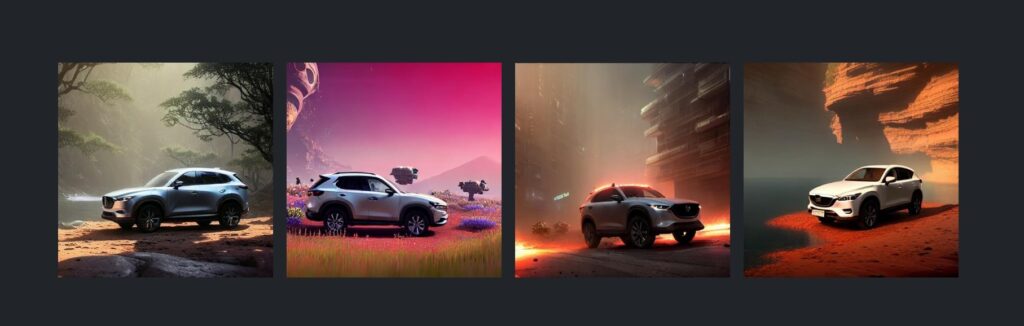
DreamBooth seamlessly puts the subject in different contexts while maintaining high fidelity to the subject. This opens the door for more personalization.
 source: DreamBooth
Note that the position and the background of the subject change in a realistic manner.
DreamBooth can also do the following:
- Text-guided view synthesis. For example, A dog from the top, A hen from the side
- Property modification such as A red Rolls Royce, A cross of Shiba Inu and a lion
- Accessorization. For example, A Shiba Inu dog in a superman outfit
In this article, you will learn how to use DreamBooth seamlessly without any coding environment, installation, or a GPU with gigabytes of VRAM. Also, you will get to know the use cases of DreamBooth.
Rules to Follow While Using DreamBooth and DreamBooth Related Products
- Strictly no nudes and non-G-rated content.
- Always upload 10-20 photos of the subject.
- Every image that you upload for fine-tuning must introduce new information to the AI.
- Upload a combination of full-body or entire object, half-sized photos, and close-ups for better results.
- It’s all about variation. Give different poses under different lighting and backgrounds. Infuse various emotions and expressions. Capture the subject’s eyes looking in different directions, and take an image with closed eyes as well.
- Anything you captured will be interpreted as input. Hence, ensure to avoid certain backgrounds or exposure.
- Do not create or upload photos of other people without their consent.
- Always stick with the “content policy” and “terms and conditions” of the AI model that you are using.
How to Use Google’s DreamBooth: No Code and No Colab
Usually, DreamBooth can be used on Google Colab notebook for free. However, most people are not ready to access DreamBooth on Colab notebook due to the coding environment it has.
But they are obsessed with DreamBooth and its artwork. And they desperately need an intuitive interface to use DreamBooth.
The solution has arrived in many forms but comes at a cost. If you are willing to spend a few pennies on DreamBooth over pizza, try out the below products.
DreamBooth As a Product
If there is a new technology or product, there must be a ton of opportunities.
The potential of DreamBooth has amazed a lot of people. A few of them came up with creative ideas and turned those ideas into successful products.
Now, these products are fulfilling the dream of ordinary people who wanted to use DreamBooth with a simple and easy-to-use interface.
Astria
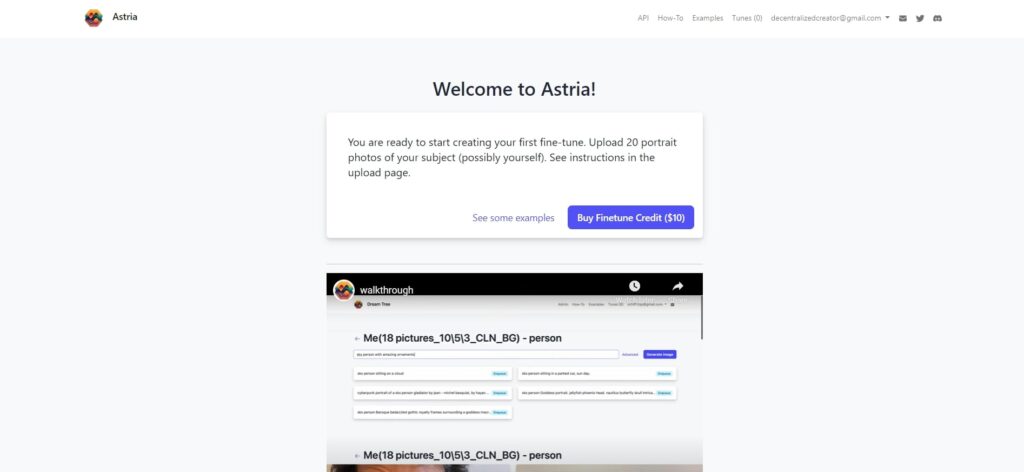
Astria is a product that is based on DreamBooth. Anyone can start creating tailor-made images using this AI.
Just upload at least 20 images to train the model. Training or fine-tuning the model should take 90 minutes. However, depending on the queue, it may take longer.
Once the fine-tuning is over, you can use the prompt to generate various versions of yourself or the subject you have uploaded.
Astria has a one-time fee of $10 to buy credits. The credits purchased must be used within one year. Otherwise, it will expire.
For more information, check out Astria’s content policy and Terms and Conditions.
How to Use Astria
- Sign in using your Gmail account.
- As a first step, you need to fine-tune the model for a subject that you want to experiment with. To do so, you need to upload 20 portrait photos. The subject can be you or your dog or anything. As of now, only the JPG format is supported on the platform. Resize your input photos to 512 x 512 or 1:1 ratio before uploading.
- Upload at least 3 photos of the full body or entire object, 5 half-sized photos from the chest up, and 10 close-ups for better results.
- While uploading the images you need to give a className for your subject. If the subject is a human being, enter the classname as “person”.
- Wait 90 minutes or so for the fine-tuning to be completed.
- Next, you need to enter prompts. While entering the prompt, you must include “sks className” to represent the subject.
- Voila! Get your personalized images generated by AI.
Pros and Cons of Astria
Pros
- Provides CKPT file
- One-time payment: Pay one time and enjoy one year of access
- API support
- No storage of training data after 30 days: the model, ckpt file, images and prompts everything will be deleted automatically after one month.
Cons
- Supports only JPG formats
- No built-in higher resolution option
ProfilePicture.AI

ProfilePicture.AI is a product powered by DreamBooth technology that specifically designs your profile picture in any context you want. It is created by Danny Postma and the platform actually uses Astria for AI processing and training.
Just upload at least 10 photos of the subject to train the model. Training or fine-tuning the model should take 3 hours. That’s it, ready to receive 100 of your profile picture.
ProfilePicture.AI takes the customization and personalization capabilities of DreamBooth to the next level. Since the quality of the output is in 4K formats, it can be printed on a laptop bag, mobile case, notebook, etc. The best part is that the product now supports couples too!

ProfilePicture.AI has two one-time fee structures: Small for $24 and Large for $34. You will get 104 photos in 512×512 format and 120 photos in 4K format.
For more information, check out Terms and Conditions and Privacy Policy of ProfilePicture.AI
How to Use ProfilePicture.AI
- Sign in using your email address.
- Choose the plan and make payment.
- Upload at least 10 photos of the subject in different variations as mentioned in the “Rules” section of this article.
- For better results, include 6+ headshots and 12+ upper body photos in the training set.
- Then, include the name and select what the subject is and upload the photos.
- You will be notified via email once the training/ fine-tuning is over. Come back and collect your profile picture.
Pros and Cons of ProfilePicture.AI
Pros
- Has hundred’s of style
- Good for printing: 4K format and 300 dpi
- The generations of ProfilePicture.AI could be a great birthday gift
- One-time payment
- No retention of user information after 14 days
Cons
- High fine-tuning or training time: It could take up to 120 minutes
- Platform access is restricted to 12-year-olds and below
Avatar AI

Avatar AI is a fun product powered by DreamBooth and developed by levelsio. As the name suggests, the product creates different avatars of the uploaded subject.
Upload 20 images of yourself, a couple, a dog, or a cat to train the model. The training or fine-tuning of the model should take an hour to complete. Then, get ready to receive hundreds of your avatars in 14 different styles.
Avatar AI has three pricing options:
- $40 package includes 512×512 low-res, good for profile picture
- $60 package includes 2048×2048, in Full HD, good for social media
- $70 package includes 4096×4096 4K at 400 dpi, which good for printing
For more information, read Terms and Conditions of Avatar AI.
How to Use Avatar AI
- Select the subject using the dropdown given at the beginning of the website.
- Make a payment.
- Upload at least 20 photos with multiple variations as mentioned in the “Rules” section of this article for better results. The input set of photos must include 10 portrait photos of your face (show your shoulders), 5 photos from above your abdomen, and 5 full-body photos.
- You will be notified via email once the training/ fine-tuning is over. Come back and collect your 100+ avatars.
Pros and Cons of Avatar AI
Pros
- Less training time compared to other models
- No input image and trained model information has been retained after 24 hours and no render information has been retained after 30 days
- Good for printing: 4K format and Full HD
- Couple of avatars could be a great birthday or wedding gift
Cons
- No live chat
OpenArt
OpenArt by default is not a dedicated product for DreamBooth. Rather, it is basically a search engine for Stable Diffusion, DALL.E 2, and Midjourney art and prompts. You can also generate AI art via OpenArt.
Recently, OpenArt has launched a feature called Photo Booth, which is basically a DreamBooth training option. This Photo Booth allows users to easily train their photos in different contexts.
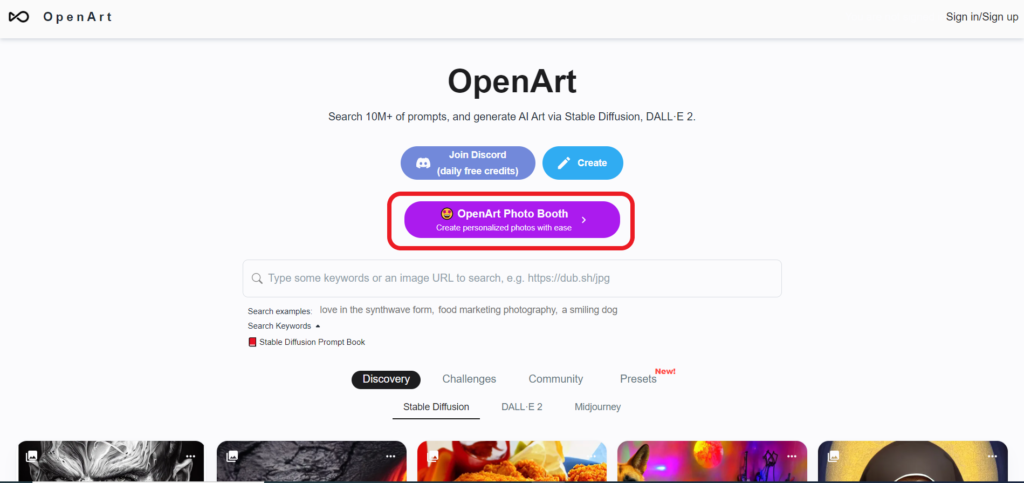
With OpenArt’s Photo Booth, anyone can create images as an astronaut, a king, a wizard, a portrait, a line art, etc.
To train the model for a person, upload 20-30 photos. The training will take almost one hour. Following the training, you can generate different versions of yourself or your uploaded subject using the prompt. It has a fee of $10.
It also has plenty of presets to choose from. Presets are templates that allow the creation of high-quality photos without the need for prompts. It is notable that presets come with a separate price tag.
How to Use OpenArt’s Photo Booth
- Go to OpenArt website and click “OpenArt Photo Booth”.
- Now, choose a category to get started. You can train a person, pet, character, art style, object, and others.
- After selecting the category, you need to pay for this service, which is $10. In this payment window, you can choose presets if you want.
- Following the payment, you can see your AI model. Click “My AI Model”.
- Now, you will get a set of trained images if you have chosen any preset at the payment window. Otherwise, you need to train the with your prompt.
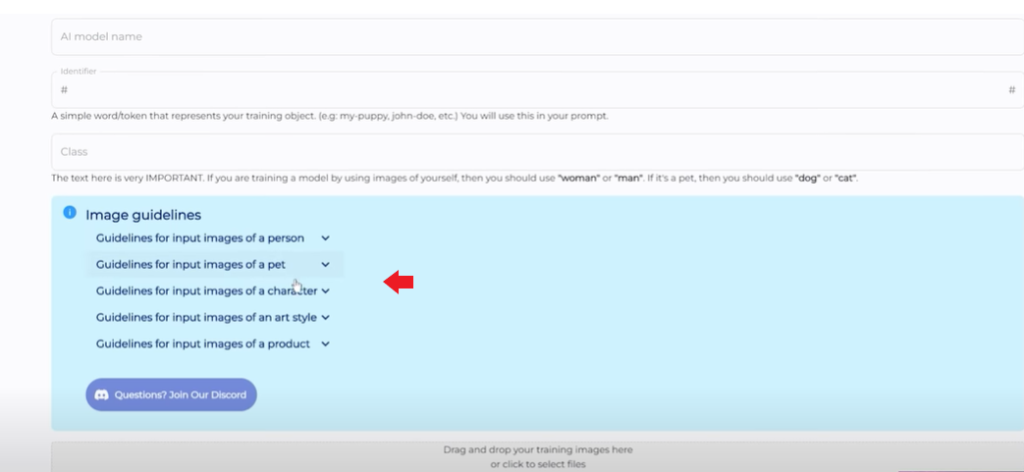
- To train a model, you need to set a model name, identifier, and class name. For example, a model name can be “animation”, the identifier can be “anime”, and a class name is man, woman, or pet. Remember that you have to use the identifier and class name in your prompt.
- After setting the model, identifier, and class name, it is important to go through the guidelines.
- Now, you can use your prompt to generate images. Example prompt: Portrait of #anime# man with the backdrop of a snowy mountain.
- Finally, you can download the AI-generated images and/ or upscale them if you want.
Note: If you are good at prompt engineering, you can apply for the “Preset creator program”
Pros and Cons of Photo Booth
Pros
- Allows to train even an object
- Provides CKPT file
- Lower price compared to Avatar AI and ProfilePicture.AI
- No prompts are needed to create images while using presets
- No storage of training data after 30 days
- Supports enhancement of face apart from normal upscaling
Cons
- Moderate user interface
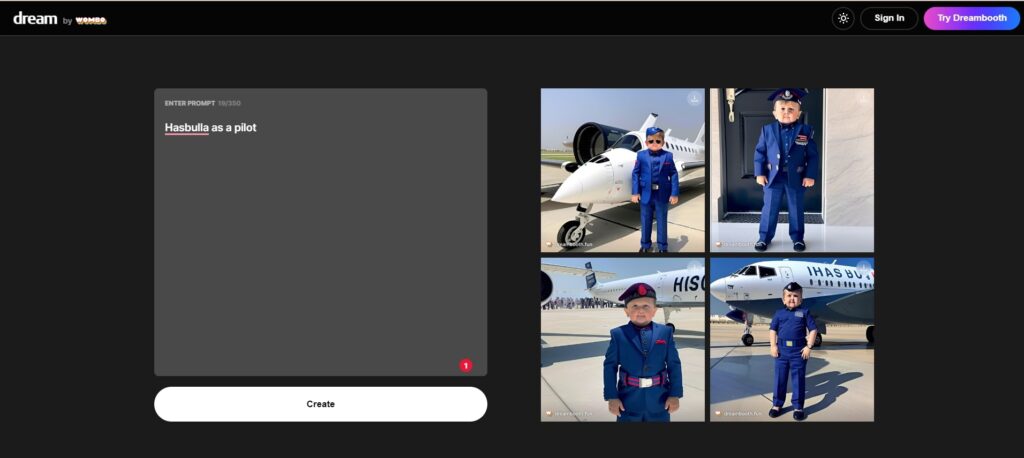
Dream by WOMBO
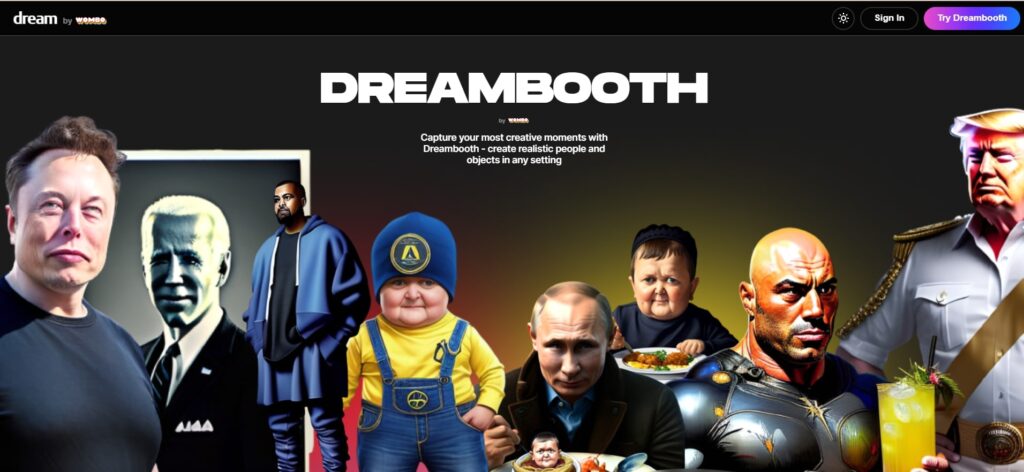
Dream by WOMBO is a product by WOMBO, a startup that focuses on creating consumer-focused AI experiences. The company is famous for AI-powered lip sync.
Dream powered by DreamBooth allows anyone to create realistic people and objects in different settings with different properties.
Currently, Dream allows only a limited number of public personas to experiment with. It will soon allow you to upload a photo of yourself for the DreamBooth experiment. Sign up for the waitlist on the website.
The fine-tuning duration of the model and the price will be updated once they release the full operational model.
Pros and Cons of Dream by WOMBO
Pros
It has a mobile application for Android and iOS.
Use Cases of DreamBooth
Product Shots
One of the main use cases of DreamBooth is product photography. Many e-commerce companies, fashion companies, and vehicle manufacturers are spending thousands of dollars on product photography.
The presence of DreamBooth might redefine product photography for many industries that rely on it. With DreamBooth, anyone can achieve the instant realization of their vision.
Profile picture
Apart from commercial purposes, DreamBooth can be used for fun too. Profile pictures are the first thing people see when they look at your online profile. With DreamBooth, you can make the best and most enjoyable first impression.

Concept Art
DreamBooth allows you to realize your personalized concepts with augmented creativity. It can be a playground to experiment, modify, and fine-tune your concepts.
Conclusion
If you are obsessed with DreamBooth and intimidated by the coding environment, you will definitely have a good time exploring each of the products listed here.
In case you want to use DreamBooth for free, you can try on the Colab notebook. The choice is yours.
Apart from the DreamBooth products listed here, you can also try the Stable Diffusion API.
FAQ
1. What is a CKPT file and how to use it?
The .ckpt file is a Checkpoint File that is generated by a system or product after the execution of training a model. With a ckpt file anyone can generate images using textual prompts on their local machine.