Callisto Network is a smart contract ecosystem with a real emphasis on security. Build, stake and trade on a never compromised blockchain.
Callisto Network is a proof of work blockchain with a strong emphasis on security. Building on its native cryptocurrency (CLO), Callisto Network is a layer 1 smart contract solution offering a unique set of features.
There are three ways to add Callisto (CLO) to MetaMask:
- Steps to Add Callisto to MetaMask
- Steps to Add Callisto to MetaMask through Chainlist
- Steps to Add Callisto to Metamask Mobile Application
Table of Contents
Steps to Add Callisto to MetaMask
- Install MetaMask & Create an Account
- Click Add Network
- Add the Callisto Network
1. Install MetaMask & Create an Account
You can skip this step if you have already installed MetaMask
First, you need to the MetaMask Website to download the extension
MetaMask is available as an extension on Chrome, Firefox, Brave, and Edge.
Once you download the extension, click on the extension.
You need to set a password and store your secret recovery phrases during the account creation process.
If you have not set up a MetaMask wallet, you can check out this guide: How to Create a MetaMask Wallet: A Step by Step Guide
2. Click Add Network
Once you are done with the installation and account creation process, you need to launch your MetaMask wallet extension.
Click the network dropdown box.
Then, click Add Network

3. Add the Callisto ( CLO ) Network
A window will appear after clicking Add Network to allow you to add a custom network.
You need to add the details one by one manually
We recommend you copy-paste the details instead of typing.
Callisto ( CLO ) Network Details :
Network Name: Callisto Network
New RPC URL: https://rpc.callisto.network
Chain ID: 820
Currency Symbol: CLO
Block Explorer URL: https://explorer.callisto.network/
After copy-pasting the above network details, you need to click Save.
The Callisto network will automatically get changed on your MetaMask Network.
You can confirm this by navigating into your MetaMask Wallet
Steps to Add Callisto (CLO) to MetaMask Application Through ChainList
- Install MetaMask and Create an Account
- Go to ChainList and Seach Callisto
- Add Callisto to MetaMask
1. Install MetaMask & Create an Account
You can skip this step if you have already installed MetaMask
First, you need to the MetaMask Website to download the extension
MetaMask is available as an extension on Chrome, Firefox, Brave, and Edge.
Once you download the extension, click on the extension.
You need to set a password and store your secret recovery phrases during the account creation process.
If you have not set up a MetaMask wallet, you can check out this guide: How to Create a MetaMask Wallet: A Step by Step Guide
2. Go to ChainList and Search Callisto
Go to ChainList and Search Callisto.
By Clicking Connect Wallet, You can connect your MetaMask Wallet to ChainList.
Click Next and Click Connect
3. Add Callisto to MetaMask
After Connecting your MetaMask to the ChainList.
You can click “Add to MetaMask”
You receive a notification from MetaMask, Click Approve.
Then Click Switch Network
The Callisto Network has been added to your MetaMask Wallet.
You can confirm by navigating to the MetaMask Wallet.
Steps to Add Callisto ( CLO ) to MetaMask Mobile Application
- Install Metamask Mobile Application
- Tap on Setting
- Tap on Add Network
- Add the Callisto ( CLO ) Network
1. Install Metamask Mobile Application
If you already have MetaMask mobile application installed, you can skip this step.
MetaMask applications can be downloaded here: Android and IOS
After the download, open the application and tap on Get Started.
Now, you will be able to see two options; Create a New Wallet and I already have a wallet
If you already have an account in MetaMask wallet. You need to tap on I already have a wallet and enter your seed phrase.
Otherwise, you need to tap on Create a New Wallet.
Creating a new wallet is a simple task.
You need to set a password and store your seed phrase/ recovery phrase.
2. Tap on Settings
After the installation, you need to tap on the three parallel lines on the top left side of your MetaMask application.
Then, you need to tap on Settings.

3. Tap on Add Network
Now, you will be able to see multiple options
Just tap on Networks.

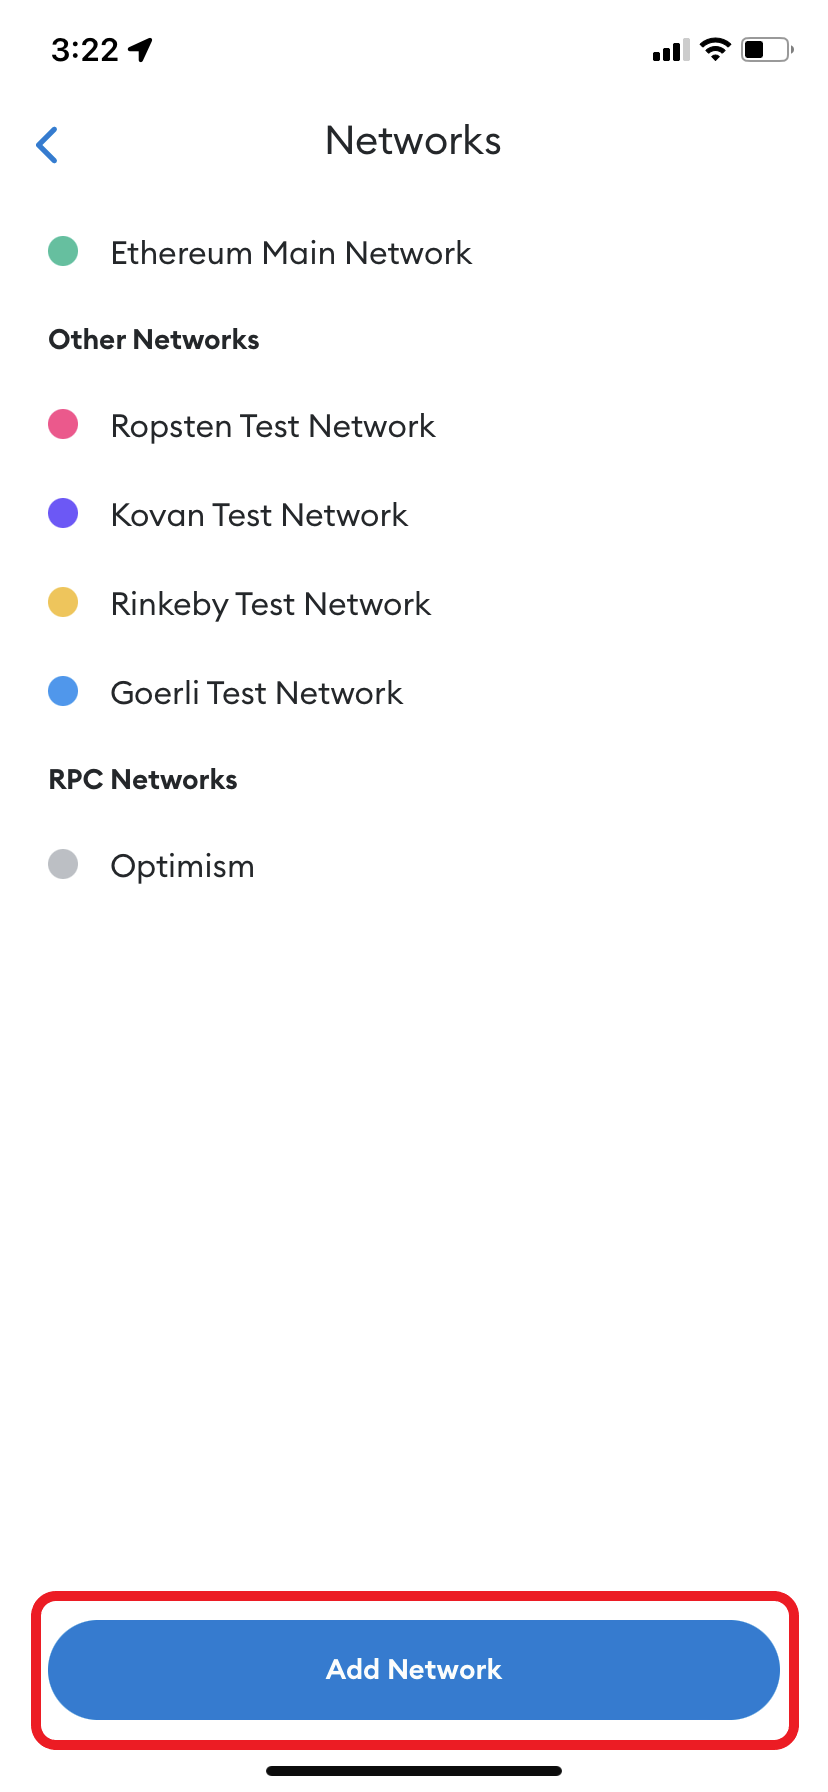
Now, you see networks that are already added to your MetaMask application.
To add the Callisto network, you need to tap on Add Network.
4. Add the Callisto Network
You need to manually add the Callisto network details one by one.
We recommend you copy-paste the details instead of typing
Callisto ( CLO ) Network Details :
Network Name: Callisto Network
New RPC URL: https://rpc.callisto.network
Chain ID: 820
Currency Symbol: CLO
Block Explorer URL: https://explorer.callisto.network/
After copy-pasting the above network details, tap on Save.
After you have tapped on Save, the Callisto network will automatically get changes on your MetaMask wallet applications.
That’s it, You have successfully added the Callisto (CLO) to MetaMask applications.
Conclusion
Adding Callisto to MetaMask is a manual but simple task.
After connecting your MetaMask to Callisto (CLO), you can send/ receive CLO.
If you want to switch back to Ethereum Mainnet, you can click the network dropdown.
Then, Click “Ethereum Mainnet”.
