
To transfer Shiba Inu (SHIB) from MetaMask to Trust Wallet, you need to copy the SHIB address from Trust Wallet.
Then, Select SHIB in MetaMask and paste the address that you have copied on your Trust Wallet.
Lastly, confirm the transfer.
To transfer SHIB from MetaMask to Trust Wallet, a network fee of ~0.000679 ETH is applicable. And, this fee varies depending upon the congestion of the blockchain.
Steps to Transfer SHIB from MetaMask to Trust Wallet
- Copy SHIB Address on Trust Wallet
- Launch MetaMask Application
- Tap on “Send“
- Paste the SHIB Address and Enter the Amount
- Tap Confirm
- Check Status in MetaMask & Trust Wallet
1. Copy SHIB Address on Trust Wallet
Launch the Trust Wallet application on your mobile phone.
You will be able to see four options that include: Send, Receive, Buy, and Swap.
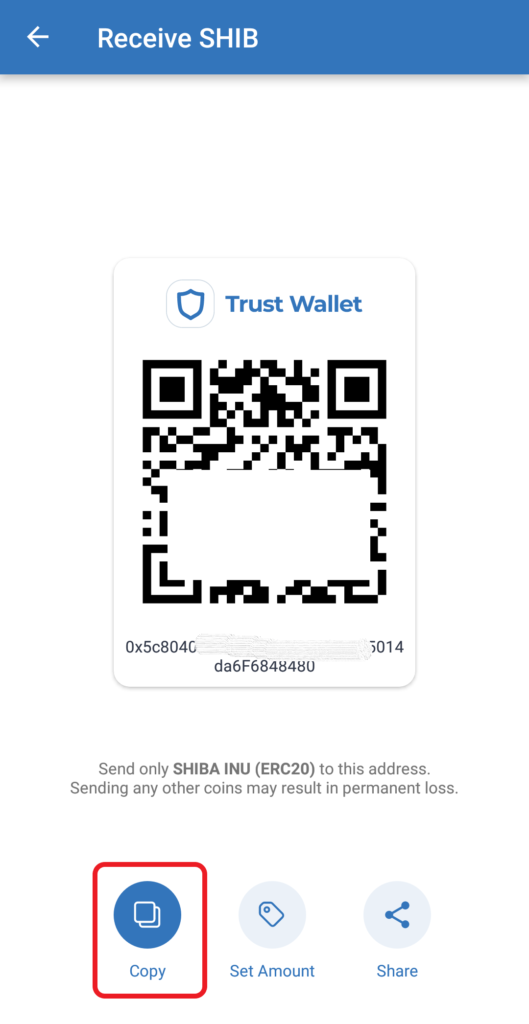
Tap on “Receive”.
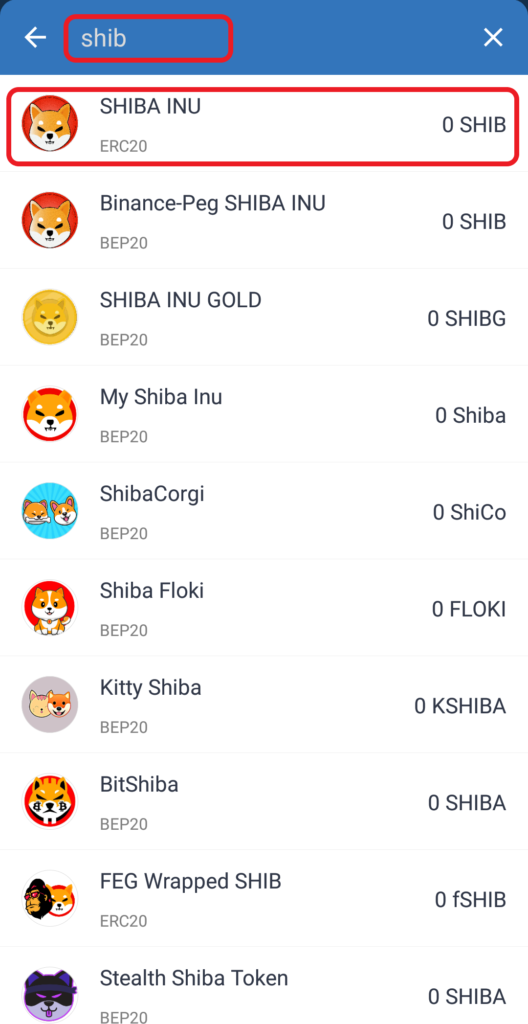
Now, you need to find SHIB. Use the search box to find it.
Tap on SHIB once you find it.
Now, copy the SHIB address.
2. Launch MetaMask Application
In case you have not installed MetaMask mobile application, you can download it here: Android and iOS.
Since Trust Wallet is only available as a mobile application, it would be easy to use MetaMask mobile application rather than the MetaMask extension.
After the download and installation, open the MetaMask application.
Make sure to be on the “Ethereum Mainnet“.
3. Tap on “Send”
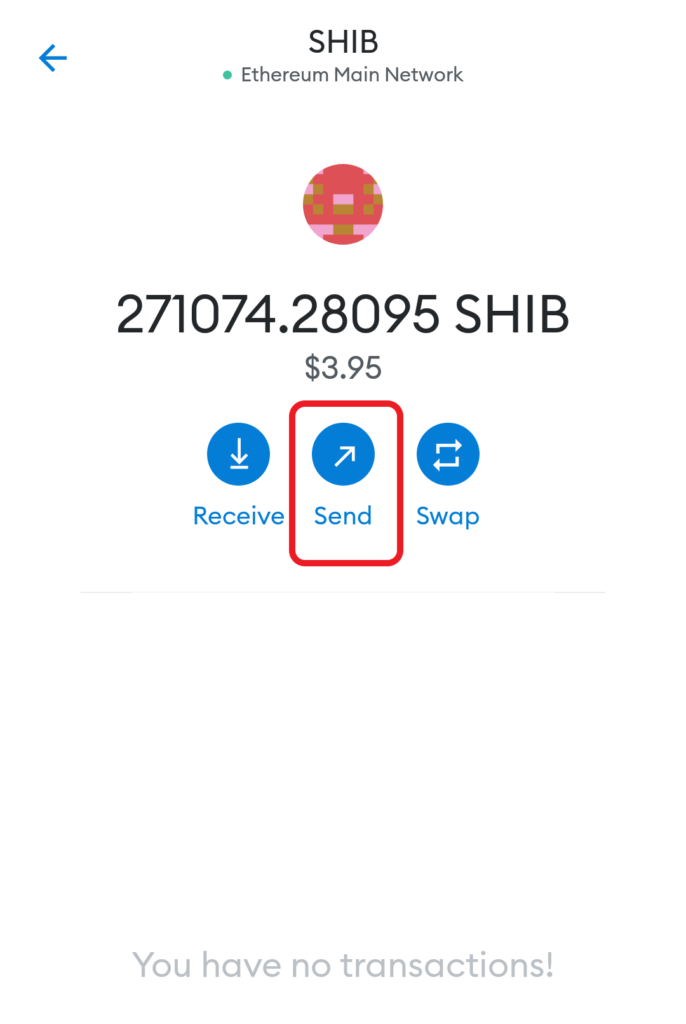
You will be able to view your crypto assets under Tokens.
If you haven’t added the SHIB token to MetaMask, you have to add it first.
Navigate to SHIB under “Tokens” and tap on it.

Then, tap on “Send”.
4. Paste the SHIB Address and Enter the Amount
After tapping Send, you will be on the “Send to” page.
Paste the SHIB address that you have copied in Step 1.
Then, tap Next.

Now, you will be able to enter the amount of SHIB that you want to send.
Use the Use “Max” button to send all SHIB you have in your MetaMask wallet.
Lastly, tap Next.

5. Tap Confirm
After tapping Next, you will be able to see the estimated gas fee and the total SHIB after deduction of the gas fee.
Review it and tap Confirm.

6. Check Status in MetaMask & Trust Wallet
Now, you can check the status of this transaction by tapping on SHIB under “Tokens” in your MetaMask wallet.
There you can see whether your transaction is pending or sent.
You can also head back to your Trust Wallet and check the SHIB balance by tapping on SHIB under “Tokens”.
For us, it took 2 minutes to receive SHIB in Trust Wallet.
Conclusion
Sending SHIB from MetaMask to Trust Wallet is an easy task.
The time taken to send Shiba Inu from MetaMask to Trust Wallet is usually 5-15 minutes. It may vary depending upon the network congestion.
You can also check the status of this transaction on the Etherscan blockchain explorer.
To do so, you need to copy-paste the MetaMask address, Trust Wallet address, or the TxID.
You can find TxID on MetaMask Wallet or Trust Wallet.
