SAITAMA is an ERC-20 token that was built on the Ethereum blockchain by the Saitama community. It was launched on May 31, 2021.
Saitama is a community that promotes the financial well-being of people through decentralized finance (DeFi).
Update: SAITAMA has been migrated from V1 to V2. Though the buying process remains the same, the contract address has been changed (see Step 3).
Unlike other meme coins such as Shiba Inu, Doge, Baby Doge, and SafeMoon, SAITAMA has a strong roadmap such as launching
- SaitaChain
- SaitaPay
- SaitaRealty
- Edutainment, a platform that educates people on how to manage, save, and invest money to create wealth opportunities.
Fast Facts of SAITAMA
- Saitama has a smart wallet SaitaMask launched on Jan 9, 2022.
- Protects its holders with an anti-whale trap. I.e. no possibility of currency manipulation by whales.
- Has an in-built burning system that burns 2% of the amount of all transactions. This creates a demand for SAITAMA tokens that results in an increase in value with time.
- Passive income system: 2% of each transaction with SAITAMA is deducted and redistributed among the pool of holders.
- Certified as critical issues free and hacker resistant by Certik.
How to Buy Saitama Inu (SAITAMA)?
To buy SAITAMA, you need to buy ETH. And then, with ETH, you can purchase SAITAMA.
SAITAMA can be purchased in 2 ways:
- Via Decentralized Exchanges (DEX) such as Uniswap, SushiSwap, and ShibaSwap.
- Via Centralized Exchanges (CEX) such as LBank, BKEX, Coinsbit, and Bilaxy.
Here we are going to buy SAITAMA in SushiSwap using MetaMask.
In case you want to buy SAITAMA in Uniswap, you can see this guide.
If you have not installed MetaMask, you can create it by reading this article.
Step-by-Step Guide for Buying SAITAMA on SushiSwap
- Buy ETH and Transfer
- Connect MetaMask
- Import SAITAMA contract
- Enter the amount
- Set slippage
- Swap ETH for SAITAMA
- Add SAITAMA to MetaMask
- Check your MetaMask wallet
1. Buy ETH and Transfer
As mentioned earlier, you need to buy ETH and then swap it for SAITAMA.
To buy ETH on Coinbase, the US’s largest cryptocurrency exchange, read this guide.
You can even buy in Binance or directly inside MetaMask.
If you have already purchased ETH, you can proceed with the Transfer part discussed just below.
Once you have purchased ETH, you will need to transfer it to MetaMask.
Send ETH from Coinbase to MetaMask or Send ETH from Binance to MetaMask.
2. Connect your MetaMask wallet
Go to the SushiSwap website and click Enter App.
By clicking Enter App, you will be in the swap window.
Then, click on Connect to a wallet located on the top right corner of your browser window.
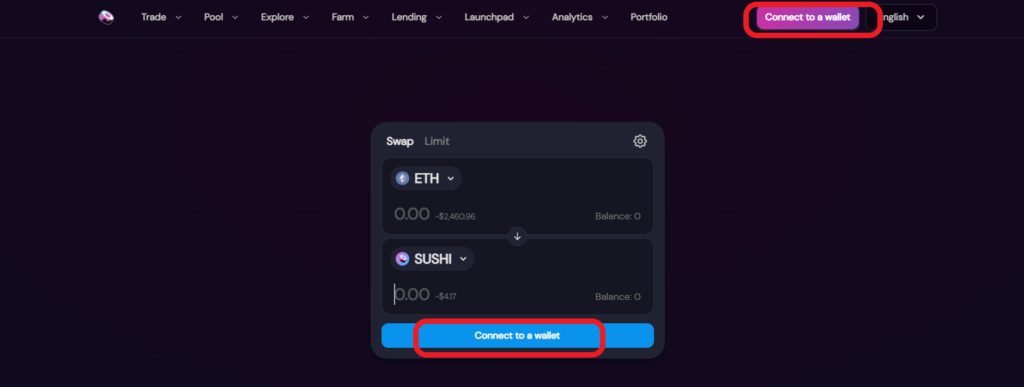
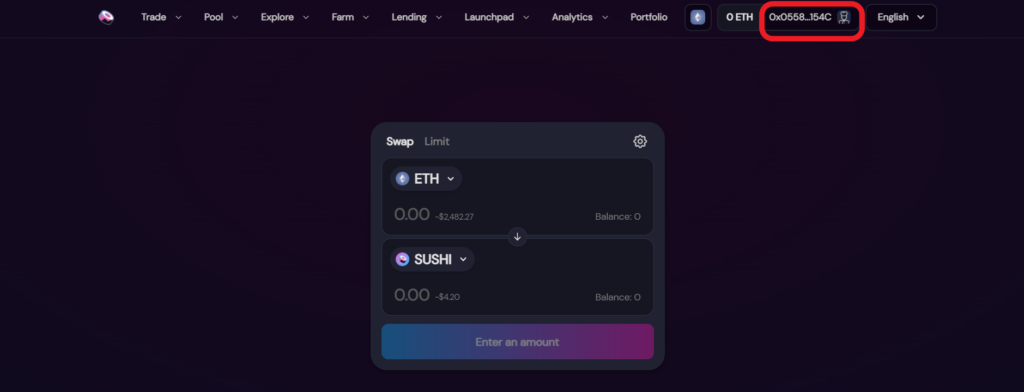
After clicking connect to a wallet, allow SushiSwap to connect with MetaMask by clicking Connect inside MetaMask.
Following is the image that shows the indication that the connection between SushiSwap and MetaMask has been established successfully.
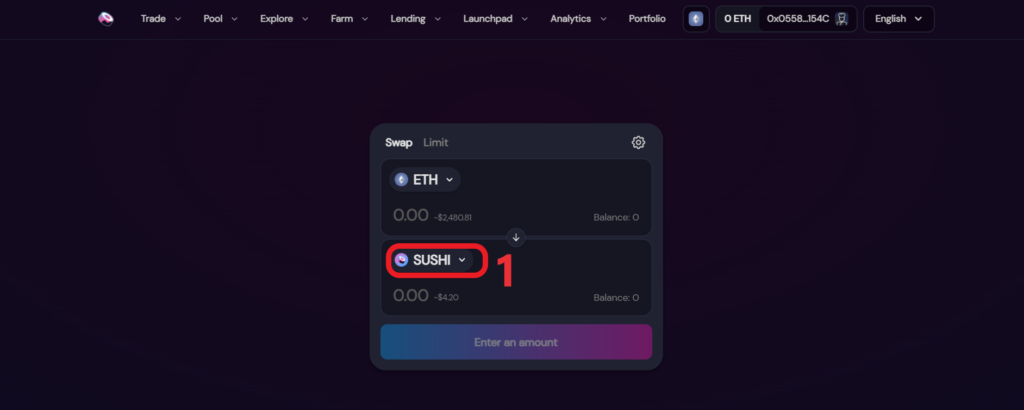
3. Import SAITAMA contract
After establishing the connection between SushiSwap and MetaMask, you need to import the SAITAMA contract.
You need to be very careful here. Make sure to copy and paste the correct SAITAMA contract, or else you could buy the wrong token.
SAITAMA Contract Address: 0x8b3192f5eebd8579568a2ed41e6feb402f93f73f
SAITAMA has been migrated from V1 to V2. Check out the new contract address.
You can find the SAITAMA Contract address on their official website.
To import the SAITAMA Contract address on the SushiSwap,
- Click on the token in the second field
- Paste the SAITAMA address that you have copied
- Click on Saitama Inu
- Click Import

4. Enter the amount
You can either enter the amount of ETH that you want to swap or SAITAMA you want.
Ensure to leave some ETH for the gas fee. Otherwise, your transaction will fail.
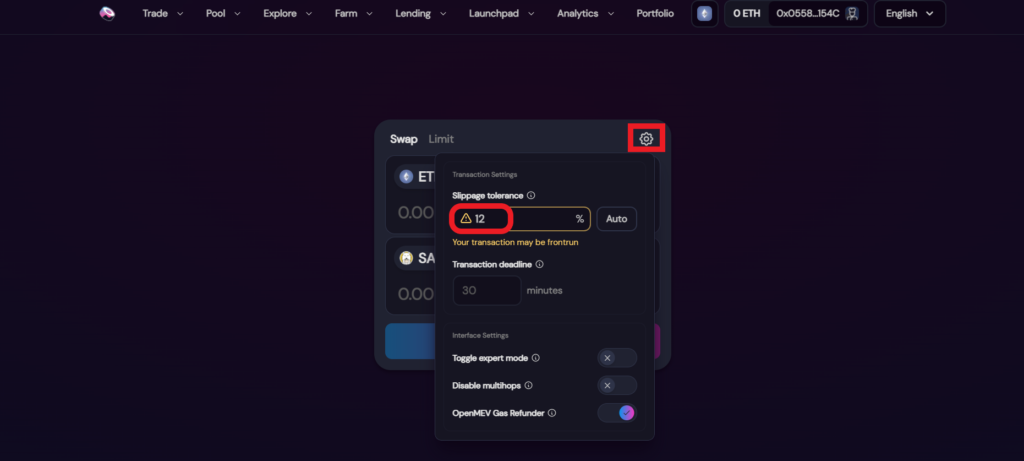
5. Set slippage
After entering the amount, you need to set slippage for your order to execute.
To set slippage,
- Click on the gear icon
- Set slippage tolerance between 5-15%
6. Swap ETH for SAITAMA
Now, click Swap.
You can see SushiSwap fetching the best swap price for you.
On the Confirm Swap, you see your order details including liquidity provider fee, Sushi fee, and price impact percentage.
Review it and click Confirm Swap.
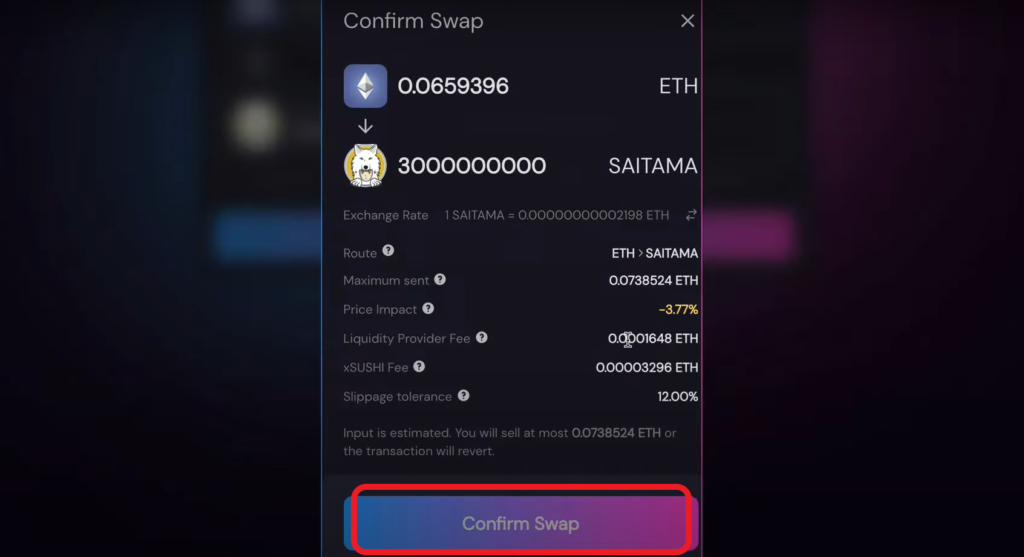
Upon clicking Confirm Swap, you will receive a notification in your MetaMask wallet. Click Confirm.
7. Add SAITAMA to MetaMask
After clicking the Confirm Swap, SushiSwap will show a prompt with Add SAITAMA to MetaMask.
To add SAITAMA to your MetaMask wallet, simply click on it.
8. Check your MetaMask wallet
Following the successful transaction notification, you need to go to your MetaMask wallet extension and check your wallet balance.
That’s it. Congratulations on buying SAITAMA.
Note: We are not financial advisors and this is not an investment recommendation.
FAQ
1. Which exchange is better Uniswap or SushiSwap?
SushiSwap is a fork (copy) of Uniswap. Uniswap is better in terms of the user interface.
Uniswap pays a higher liquidity provider fee of 0.3%, whereas SushiSwap pays 0.25%+ an additional 0.05% for SUSHI holders.
